

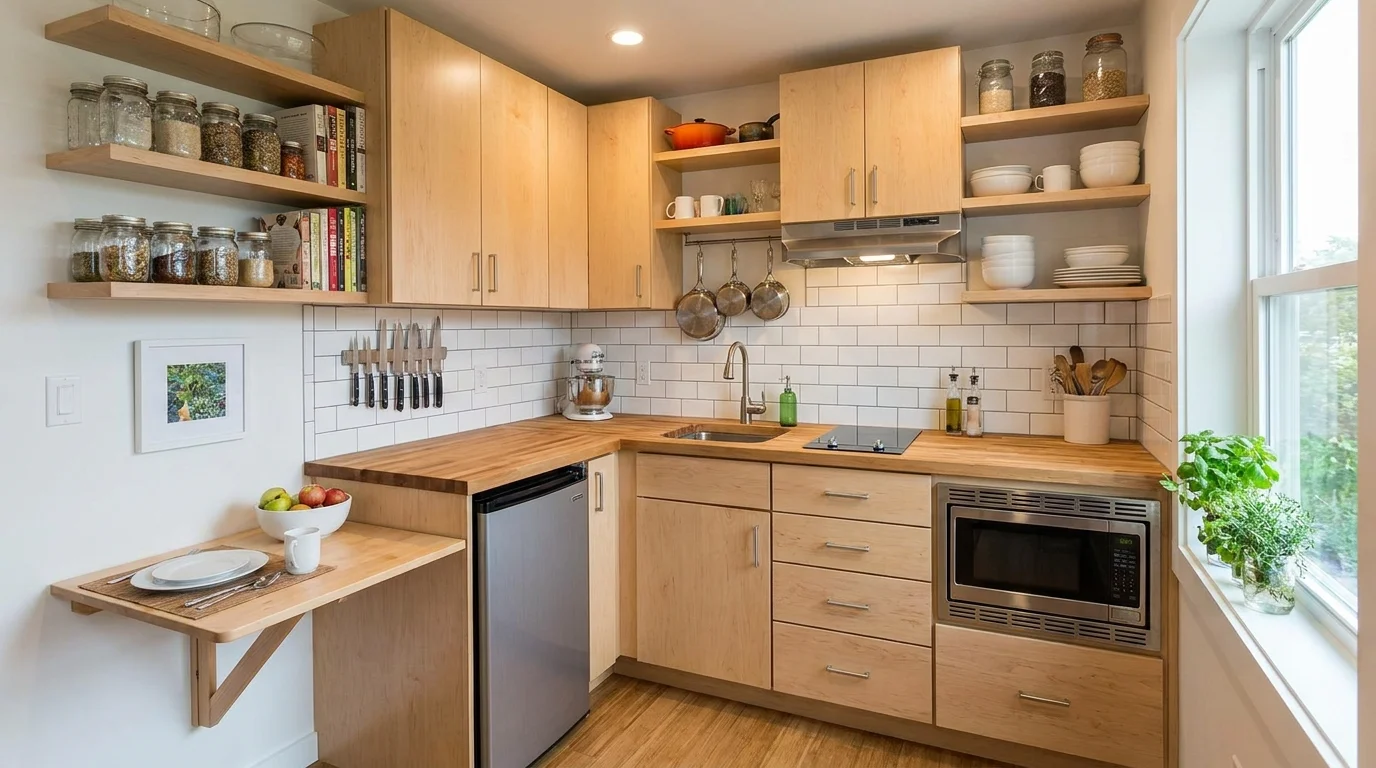
Square footage is the wrong way to judge a kitchen. A 90-square-foot kitchen with a clear path between the sink, stove, and fridge works better than a 150-square-foot kitchen where the fridge blocks the stove’s swing path. Layout is what turns square footage into usable space. In a small footprint, every decision carries more weight, because one appliance in the wrong spot forces a detour on every single cooking session.
This guide covers 15 distinct configurations, numbered and grouped by footprint, each with the one clearance number or execution detail that actually determines whether it works, plus two approaches built specifically for kitchens under about 70 square feet, where generic “small kitchen” advice usually stops being specific enough to help.
What Makes a Small Kitchen Layout Actually Work
Three things decide whether a small-kitchen layout works, and all 15 ideas below get judged against them:
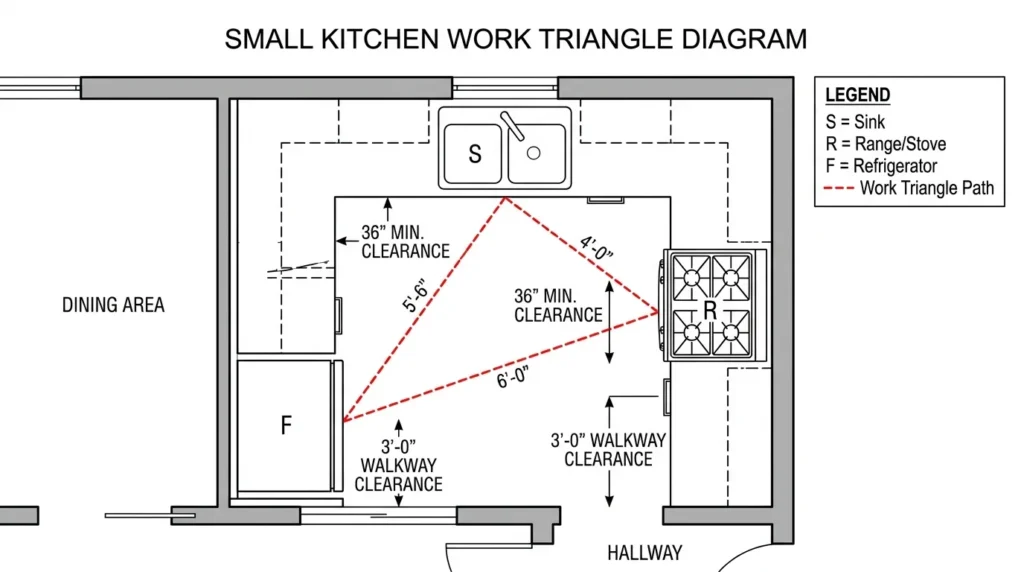
- Clearance. 36 inches minimum between facing counters or appliances for one cook; 42–48 inches if two people need to work at once. Below 36 inches, the kitchen becomes a one-person-at-a-time space no matter what else is right about it.
- Proximity. Storage sits at its point of use: pots near the stove, prep tools near the main counter, everyday dishes near the dishwasher. A layout can have plenty of storage and still feel cramped if the right storage is in the wrong spot.
- Unobstructed triangle. The path between sink, stove, and fridge should never cross a fixed obstacle. This is the single most common thing that goes wrong in small-kitchen layouts, and it’s the first thing to check before adopting any idea below.
Galley and One-Wall Footprints
1. Single-Wall Galley Layout
Every appliance and inch of storage lives on one wall; the opposite wall stays open. This is the right call for a very narrow room, or a kitchen that shares space with a living or dining area and needs to stay visually open. Since there’s no second wall to lean on, go vertical: floor-to-ceiling cabinets, open shelving above standard cabinet height, and a wall-mounted rail or magnetic strip above the stove recover storage you’d otherwise lose.
2. Double-Sided (Walk-Through) Galley Layout
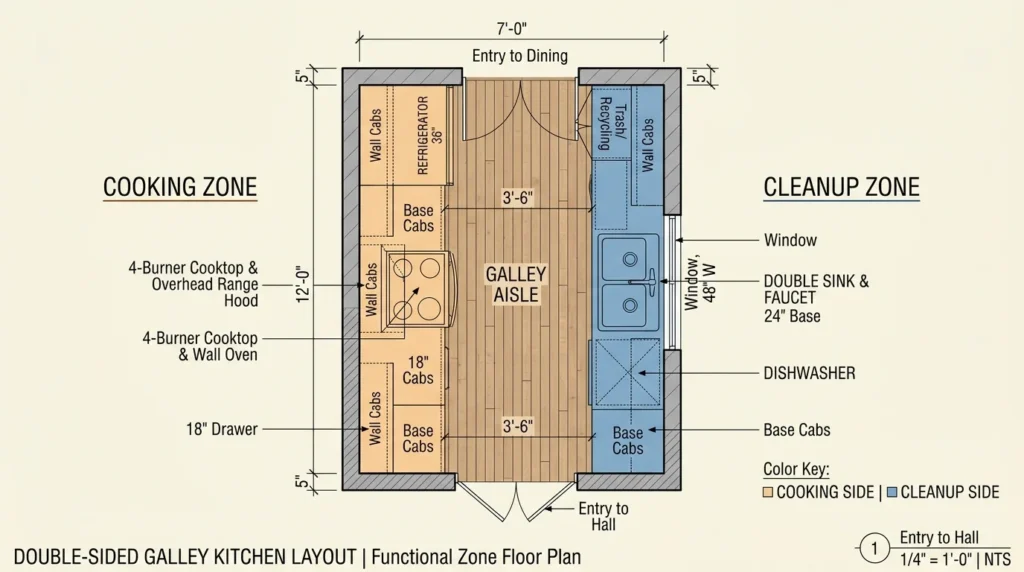
Two parallel walls of counter and storage, used in professional kitchens because it cuts the distance between every workstation to one or two steps. The number that makes or breaks it: 36 inches between the two counters, minimum. Under that, it becomes a bottleneck two people physically cannot share. Split the walls by task rather than mixing them: one side for cooking (stove, pots, prep counter), the other for cleanup (sink, fridge, dishes). That split is what keeps two people from crossing paths constantly.
3. Galley Open at One End
Same two-wall footprint as above, but one end opens directly into a living or dining room instead of dead-ending at a wall. The galley keeps its tight workflow; the open end just gives it visual breathing room it wouldn’t otherwise have. It’s also the one galley variant with real room for an add-on: a small rolling island or a bar-height counter with stools fits into the open end without disrupting either wall.
4. One-Wall Studio Layout
Everything (appliances, counters, storage) collapses onto a single wall, which is why this is the default in studio apartments: it concentrates the whole kitchen into one section of a larger room. The constraint to design around is counter space, which will be genuinely limited. Put the fridge at one end of the wall rather than the middle, since centering it breaks the one continuous counter run that makes prep possible at all, and look at an over-sink rack or a slim rolling cart to recover prep surface.
5. Pass-Through Opening
Different from #3: instead of leaving one end of the kitchen fully open, this cuts a literal opening into an existing solid wall between the kitchen and the next room, usually with a counter ledge on the kitchen side. It works when you want the kitchen to stay enclosed (containing noise, mess, and cooking smells) while still passing food, conversation, or a coffee through to the other room. A 30-to-36-inch-wide opening is enough to pass dishes through without walking around; wider than that starts to function like a true open-galley layout instead.
L-Shaped Configurations
6. Core L-Shaped Layout
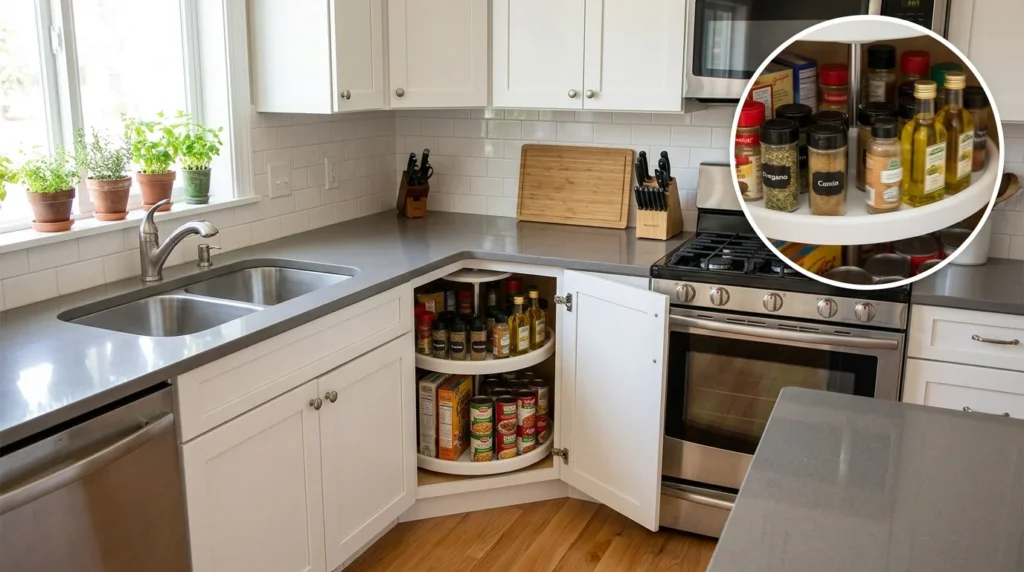
Two perpendicular walls create a natural work triangle and more usable counter than either galley option offers. The corner where the two walls meet is the highest-value prep space in the entire layout (it’s bordered by storage and appliances on two sides), so keep it permanently clear rather than letting mail, a fruit bowl, or small appliances colonize it. The corner cabinet underneath is the layout’s one real weak point: a blind corner pull-out (40–80) brings the dead zone at the back of the cabinet forward when the door opens, and a lazy Susan does the same job for less money by letting the full depth spin into reach. Assign one wall to cooking and the other to prep-and-cleanup; the 90-degree relationship between them does the rest of the work of keeping tasks from crossing paths.
7. L-Shape with a Rolling Island
Add a rolling island on locking casters to the open side of the L when you need occasional extra prep surface without committing floor space to it permanently. It rolls out for a big cooking session and tucks against a wall the rest of the time; look for one with drop-down sides, which double the usable surface only when it’s actually extended. Budget 80–200. The rule that matters most: the island needs to roll completely clear of the triangle when it’s not in use, not just get pushed a foot out of the way. Otherwise, it becomes the obstacle this whole guide is about avoiding.
8. L-Shape with a Fixed Narrow Island
A fixed island 18–24 inches wide adds permanent prep surface and, if it has open shelving or hooks on the sides, storage accessible from more than one direction, without demanding the 42–48 inches of clearance a full-size island needs. It does need at least 36 inches of clear walkway on both sides to avoid becoming a pinch point, which is tighter than it sounds once open cabinet or appliance doors are factored in. Choose this over the rolling version when the kitchen gets daily use from one cook and the extra prep surface should just always be there.
U- and G-Shaped Configurations
9. Core U-Shaped Layout
Three walls of counter and storage wrap a central work area: more storage and counter space than any other small-kitchen configuration, which is why it’s the right call for anyone who cooks often or needs more than one work zone active at once. It needs a room at least 8 feet wide to keep the center clearance workable; narrower than that and the three walls start to feel like they’re closing in rather than wrapping around you. Both far corners need a pull-out or lazy Susan (see #6) to be fully usable, since a U-shape has two blind corners instead of an L-shape’s one.
10. G-Shaped Layout (U-Shape Plus Peninsula)
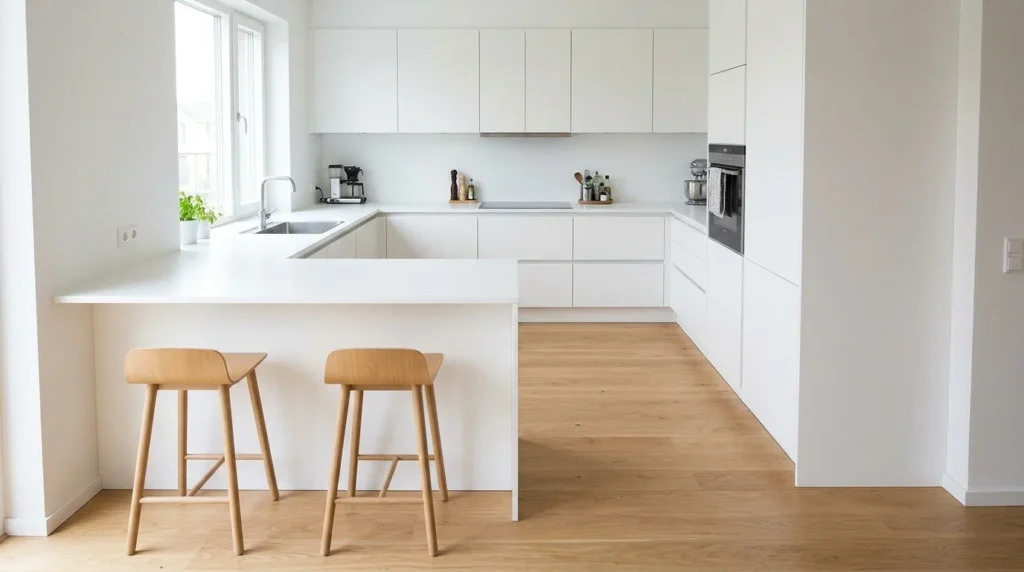
Take the U-shape above and extend one end into a peninsula, closing the fourth side partway. The peninsula adds a dedicated spot for bar-height seating or extra landing space without fully enclosing the room the way a true four-walled layout would. Choose G over a plain U when the kitchen opens onto a living or dining area and you want a seat at the counter without losing the three-wall storage capacity; choose plain U instead when floor space is tight enough that even a partial fourth wall would cut the center clearance below comfortable.
11. U-Shape with Built-In Banquette Seating
Replace one leg of the U with a fixed bench instead of standard base cabinets, and pair it with a small table or a pull-out counter extension. It trades some storage and counter run for genuine seating that a peninsula’s bar stools don’t really provide: a bench seats people for an actual meal, not just a quick perch. This works best on the leg of the U that gets the least appliance traffic, usually the one without the sink or stove, so the seating doesn’t sit directly in the cooking path.
Flexible and Open-Concept Layouts
12. Corridor Kitchen with Pocket Doors
A galley or corridor layout with sliding pocket doors at one or both ends, so the kitchen can be closed off entirely rather than staying visually open to the rest of the home. This solves a problem none of the open layouts above address: noise, smell, and mess containment during actual cooking, then an open sightline the rest of the time. It’s a strong option for anyone who entertains and wants the mess invisible from the living area, but it does give up the “feels bigger” visual benefit that open layouts trade on, so know which one you actually want before committing, since retrofitting pocket doors later means cutting into the wall cavity on both sides of the opening.
13. Peninsula Layout for Open-Concept Homes
A counter extending from one wall partway into an open living or dining space, with seating on the far side. It does two jobs at once: it’s a working kitchen counter on one side and an informal dining spot on the other, which matters most in homes too small for a separate dining room. The peninsula also visually defines where the kitchen ends without closing the floor plan off. Unlike a pocket-door corridor, the point here is staying open, just organized.
Solutions for Truly Tiny Kitchens
14. Fold-Down Counter Extension
A hinged, wall-mounted counter leaf that drops flat against the wall when not needed and folds out to extend any of the layouts above during active prep or when extra people are cooking. It’s the right answer when even an 18-inch fixed island (#8) would eat too much of the room’s clearance: a fold-down leaf adds counter inches with zero footprint cost the rest of the time. Mount it at standard counter height (36 inches) on the wall across from the primary prep zone, with at least one sturdy folding or hinged leg, so it holds real weight rather than just a cutting board.
15. Zone Micro-Kitchen (Under 70 Square Feet)
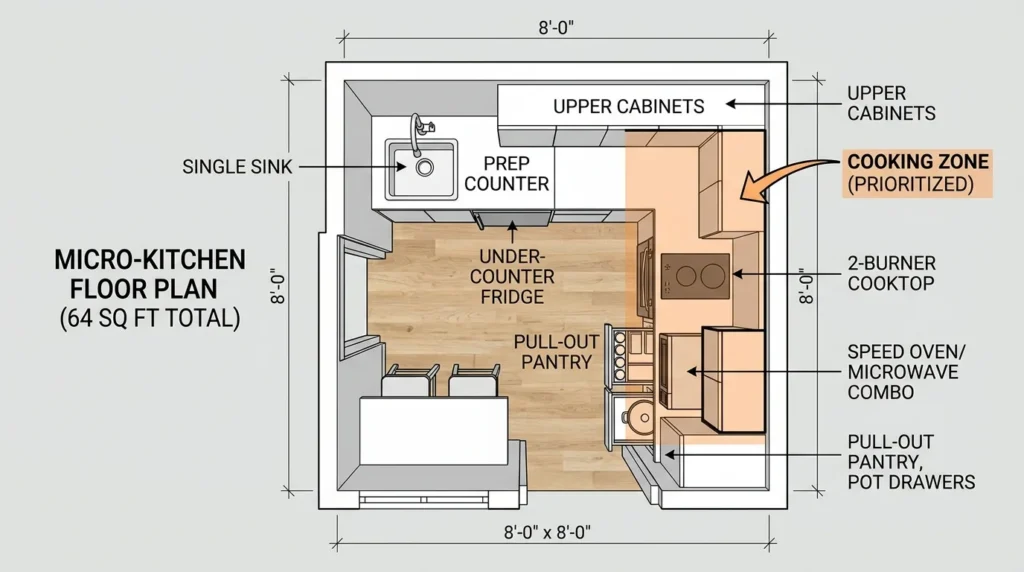
Below roughly 70 square feet, the configurations above stop being the limiting factor: there usually isn’t room to choose between an L and a U at all, and the real decision is which single zone gets priority. This is where a Zone Micro-Kitchen approach can work well. Pick one: a cooking zone (stove and the counter immediately beside it) or a cleanup zone (sink and dish storage), and build the layout’s best real estate around whichever one gets used more. The other zone gets compressed to its minimum functional footprint rather than an equal share. This is the one case where the 36-inch clearance rule above can drop to 30 inches for a single-cook galley run: tight, but workable when the alternative is a layout that tries to do everything and does none of it well.
Layout Mistakes That Quietly Sabotage Small Kitchens
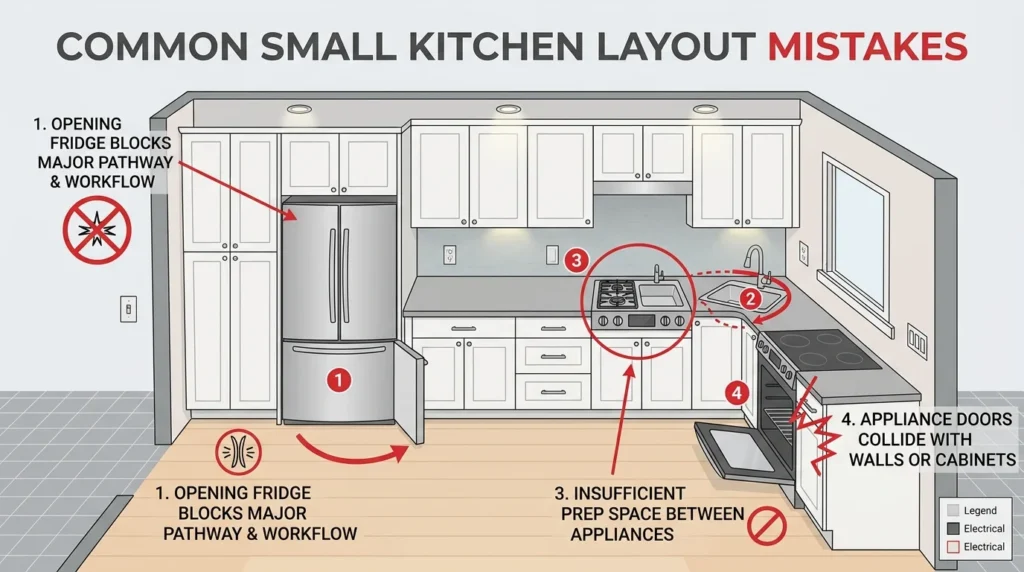
Fridge mid-counter on the cooking wall. It interrupts the one continuous counter run that makes prep possible and forces a detour around an open fridge door multiple times per meal. Put it at the end of a run instead (see #1 and #4).
A trash or recycling bin between the sink and the stove. This is the single most-used stretch of floor in the entire kitchen triangle, and a bin there turns a one-step move into a sidestep, every time, for as long as it stays there.
An island sized for the room on paper, not in use. A fixed or rolling island that leaves less than 36 inches of walkway once cabinet and appliance doors are factored in (not just the island’s resting footprint) creates a pinch point that measurements alone won’t catch. Walk the space with the doors open before committing to a size.
Treating vertical space as a bonus instead of a requirement. In any layout with 8 feet or more of available wall, upper cabinets stopping short of the ceiling or a blank wall above the counter is lost storage a small kitchen can’t spare. It’s a layout decision, not an afterthought to handle during organization.
Quick Layout Checklist
Run your own kitchen against this before changing anything:
Walking paths
- 36 inches minimum between all facing counters and appliances (42–48 if two people cook)
- Nothing fixed sits between the sink, stove, and fridge
- A clear line from the fridge to the main prep counter
Counter zones
- One prep zone stays clear of permanent items, always
- Coffee or breakfast items are grouped in their own spot, not scattered
- Only daily-use appliances live on the counter — the rest get stored
Appliance placement
- Fridge sits at the end of a run, never mid-counter
- Microwave is near the prep area or stove, not across the room from both
- Trash and recycling are not between the sink and stove
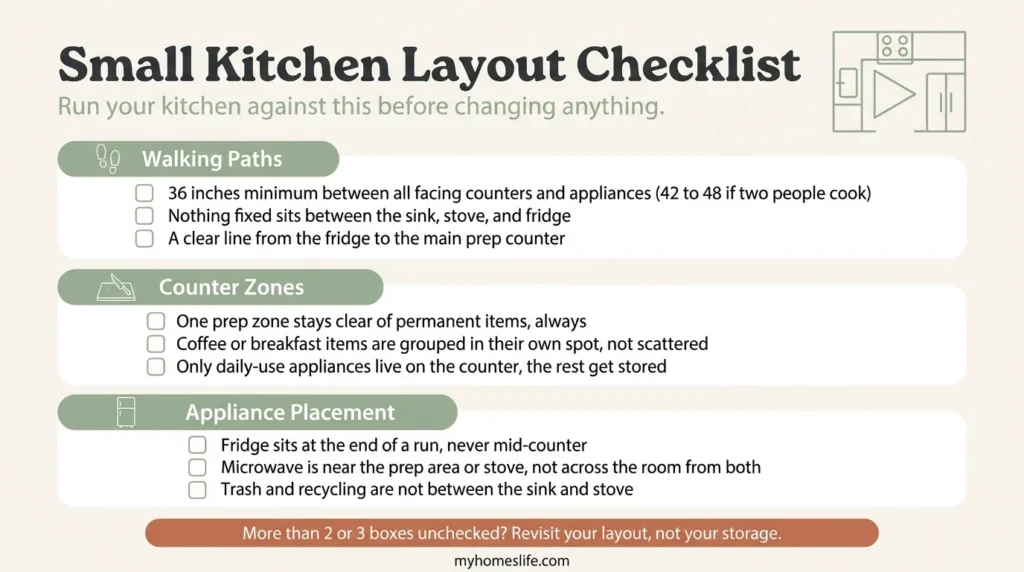
If more than two or three boxes go unchecked, the fix is almost always one of the 15 configurations above, not more storage product.
Bottom Line
Layout is the decision everything else in a small kitchen depends on. No organizer, cart, or clever cabinet insert fixes a kitchen where the fridge blocks the stove or the walkway runs under 36 inches. Get the configuration right first, from the 15 above, and storage and organization become much smaller problems to solve.
Once the layout itself is settled, kitchen organization and cabinet storage are their own separate projects worth tackling next.


Leave a Reply