

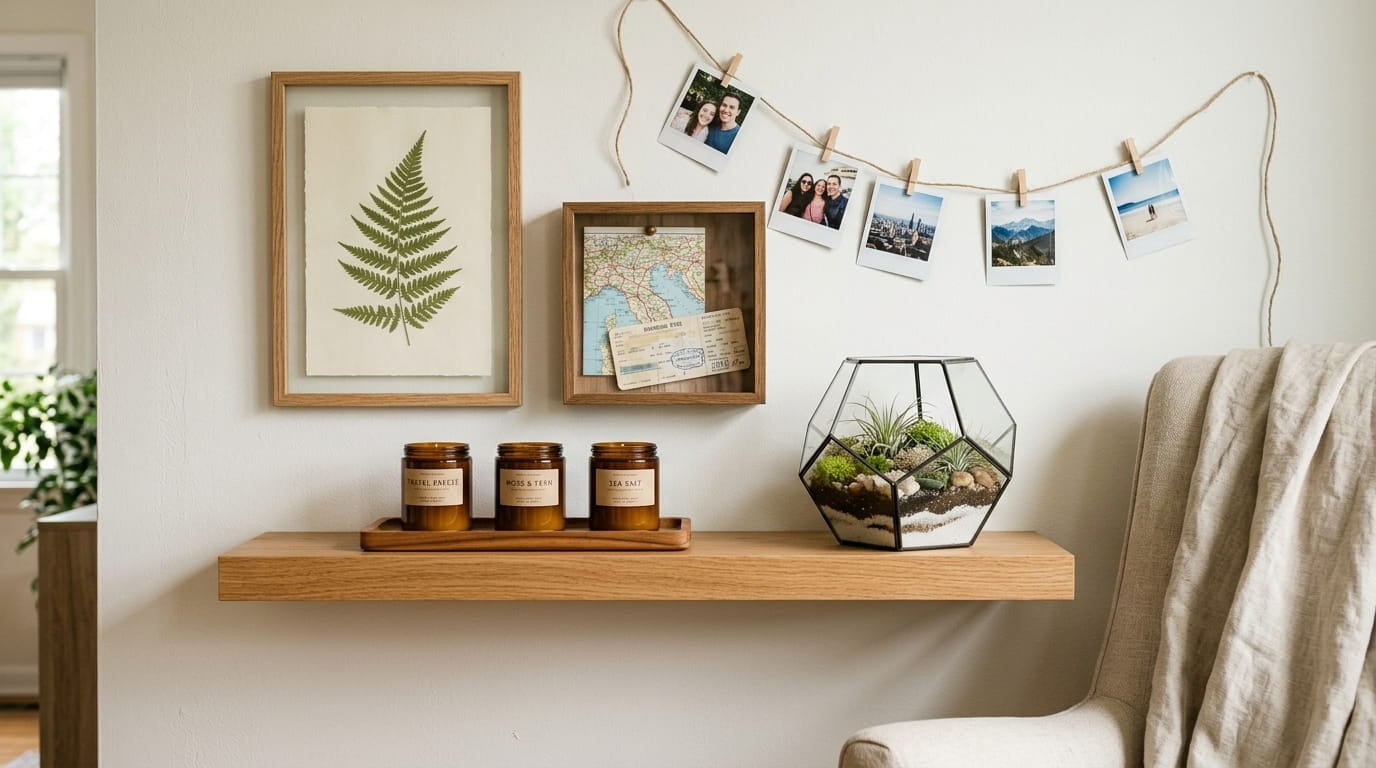
Somewhere between the overflowing junk drawer and a sealed shoebox in the closet, most of our best travel memories go to die. That ticket stub from a first solo trip to Lisbon, a handful of sand from a beach in Tulum, the postcard you never got around to mailing. They deserve better than a dark corner. Turning a suitcase full of keepsakes into real home decor doesn’t require a craft room or a design degree. With an afternoon, a glue gun, and a little patience, you can transform ordinary souvenirs into pieces that actually belong on your walls and shelves.
This roundup is full of homemade souvenir ideas that double as genuinely beautiful decor, not kitschy clutter. Whether you’re after handmade gift ideas for a fellow traveler, diy presents that feel more personal than anything store-bought, or easy homemade gifts you can finish in a weekend, these 15 projects turn your travel history into the kind of decor that starts conversations instead of collecting dust.
Quick-Takeaway: Best Memory Crafts at a Glance
Short on time? Here are six of the most popular homemade souvenir ideas from this list.
| Project | Best Room/Location | Difficulty Level | Estimated Cost | Time Required |
| Pressed Native Botanical Wall Art | Hallway or reading nook | Easy | $15–25 | 1–2 hrs + drying |
| Resin-Sealed Beach Sand & Shell Coasters | Coffee table or bar cart | Medium | $25–40 | 2–3 hrs + 24-hr cure |
| Hand-Poured Travel Scented Soy Candles | Living room or bathroom | Easy | $20–35 | 1 hr + cooling |
| Memory Jar Terrariums | Kitchen windowsill or shelf | Easy | $15–30 | 45 min |
| Custom Travel Photo Recipe Cards & Stand | Kitchen counter | Easy | $10–20 | 1 hr |
| Commemorative Travel Photo Garland | Bedroom wall or mantel | Easy | $10–15 | 1–2 hrs |
Elegant Wall & Frame Display Ideas
Walls are the easiest place to start, because framing instantly elevates whatever you put behind the glass.
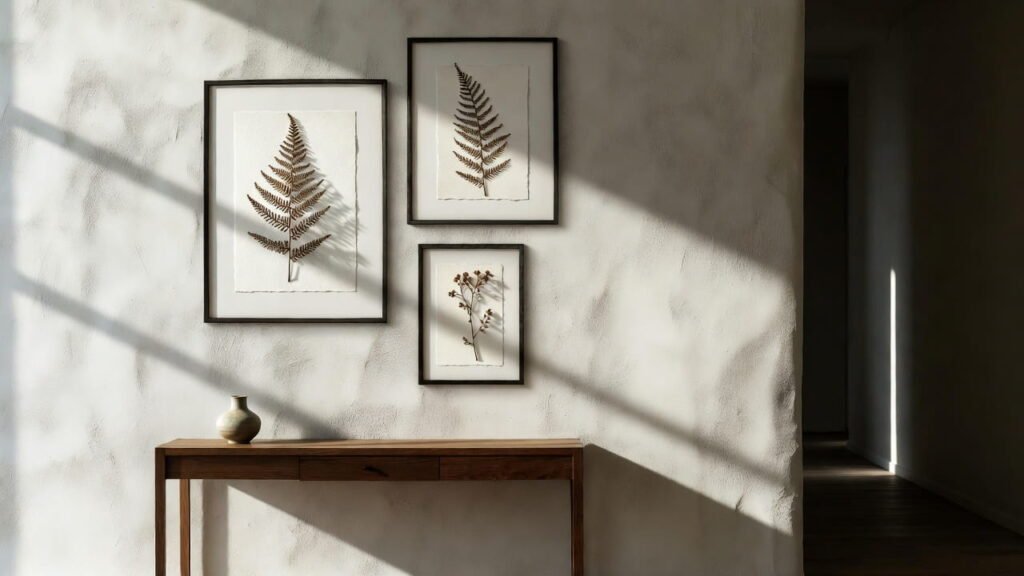
1. Pressed Native Botanical Wall Art
That flower you picked on a hike or the fern leaf from a rainforest trail holds up beautifully once it’s pressed and framed. It’s one of the gentlest homemade souvenir ideas on this list, and it reads as intentional botanical art rather than a dried-out keepsake.
Materials Needed:
- Flowers, leaves, or ferns collected on your trip
- A flower press or heavy books
- Acid-free cardstock or watercolor paper
- A thin-profile frame with UV-protective glass
- Archival glue or photo corners
How-To Steps: Press your botanicals flat between parchment paper inside a flower press (or stacked books) for 1–2 weeks until fully dried. Arrange the dried pieces on cardstock in a simple, asymmetric layout, then secure with archival glue or photo corners so nothing shifts. Mount behind UV-protective glass to keep colors from fading.
Styling/Placement Tip: Group three frames of different sizes in a vertical cluster down a hallway: odd numbers and varied scale read as curated, not cluttered.
2. Custom Map & Ticket Shadow Boxes
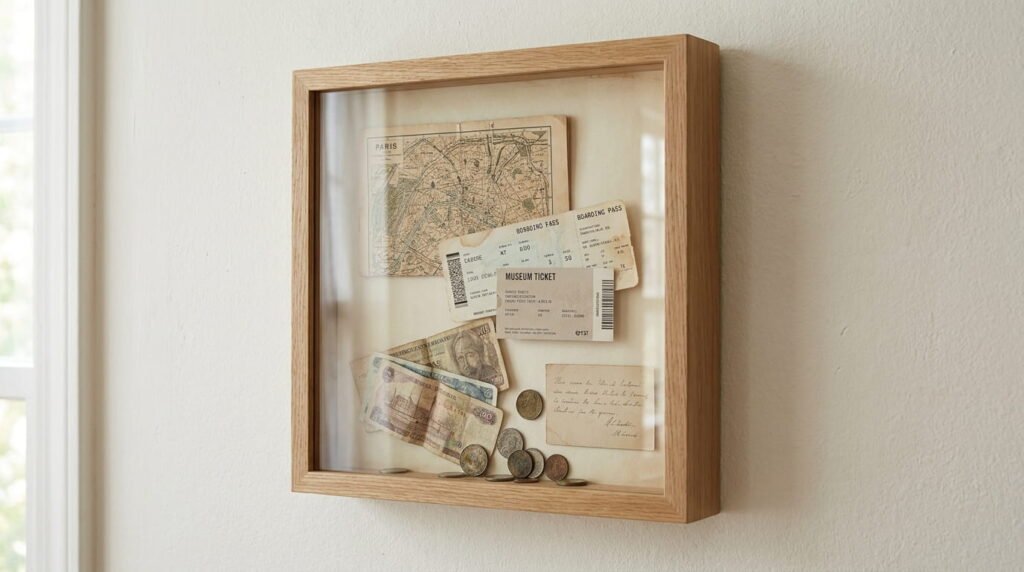
A shadow box turns flat paper ephemera (boarding passes, museum tickets, a torn map corner) into a dimensional display. These make some of the most thoughtful presents homemade from a trip you took together, since each box tells a specific story.
Materials Needed:
- A deep shadow box frame (1.5″–2″ depth)
- Boarding passes, tickets, maps, foreign currency
- Acid-free mounting tape or small foam dots
- Fine-tip pen for handwritten labels
How-To Steps: Lay your items inside the box and experiment with layout before committing; overlapping slightly adds depth. Use foam dots under larger items to lift them off the backing for a subtle 3D effect, and acid-free tape for flat paper. Add a small handwritten label with the destination and date in a bottom corner.
Styling/Placement Tip: Shadow boxes work best displayed alone or in pairs, not stacked in a gallery wall. Give each one breathing room so the contents stay legible.
3. Resin-Sealed Beach Sand & Shell Coasters
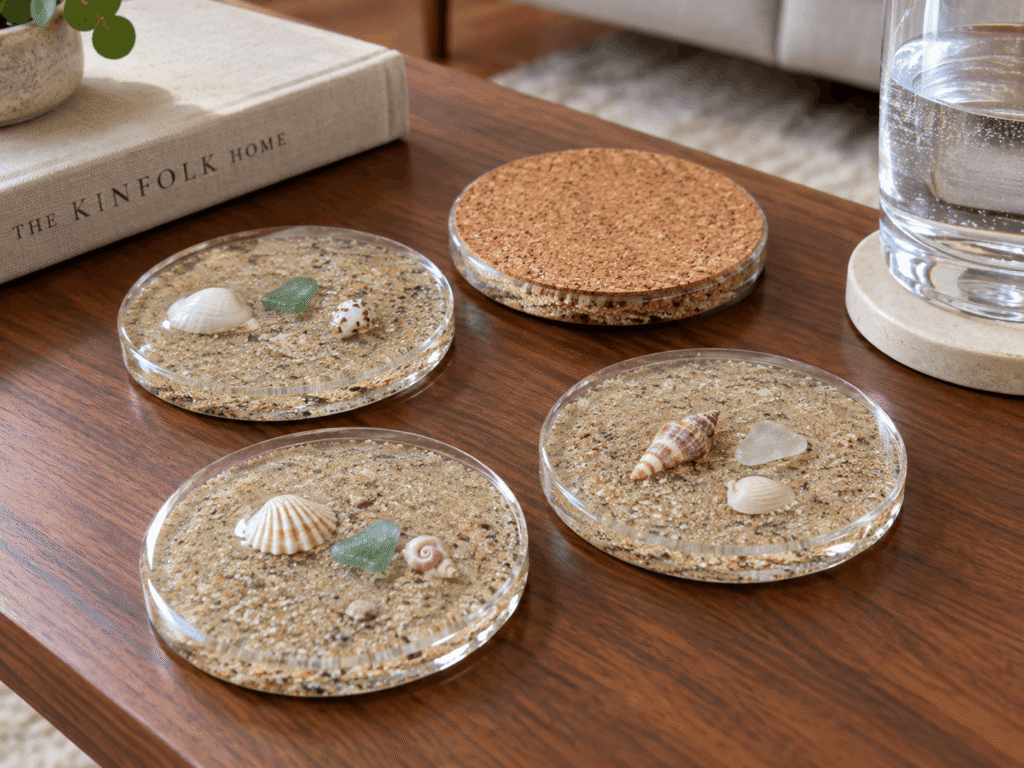
If you brought home a jar of sand from every beach vacation, this is the project that finally puts it to use. Sealing sand and shells in resin keeps them protected, mess-free, and genuinely usable.
Materials Needed:
- Silicone coaster molds
- Clear casting resin and hardener
- Fine beach sand, small shells, sea glass
- Mixing cups and stir sticks
- Cork backing pads
How-To Steps: Mix resin and hardener per the product’s ratio, then pour a thin base layer into each mold and let it tack up for 30–40 minutes. Press a thin layer of sand and shells into the tacky resin, then pour a final sealing layer on top. Let cure fully for 24 hours before popping out of the mold and attaching cork backing.
Styling/Placement Tip: Keep the shell placement sparse: two or three per coaster looks intentional, while a packed layer reads busy once it’s sealed.
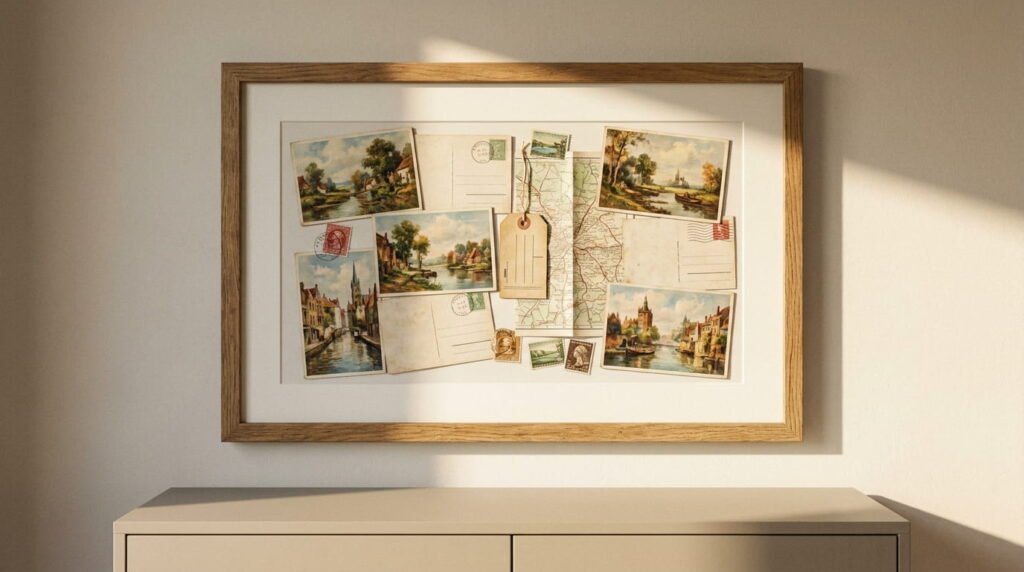
4. Framed Vintage Postcard & Map Collages
Old postcards, a folded paper map, a luggage tag: grouped together in one frame, they become a single cohesive piece instead of loose paper clutter.
Materials Needed:
- Postcards, map fragments, luggage tags, stamps
- A large flat frame or multi-opening mat
- Spray adhesive or archival glue
- Craft knife and ruler for trimming maps
How-To Steps: Trim any oversized map sections to fit your frame’s proportions, then dry-fit all pieces on the mat board before gluing anything down. Work from the center outward, overlapping edges slightly, and press each piece flat with a book overnight after gluing. Mount the finished collage in the frame.
Styling/Placement Tip: This one carries a room on its own, so hang it as a single statement piece rather than next to other framed art.
Practical Home Decor Items Made from Travel Keepsakes
These crafts turn souvenirs into things you’ll actually use every day, which makes them double as some of the best handmade gift ideas for a fellow traveler too.
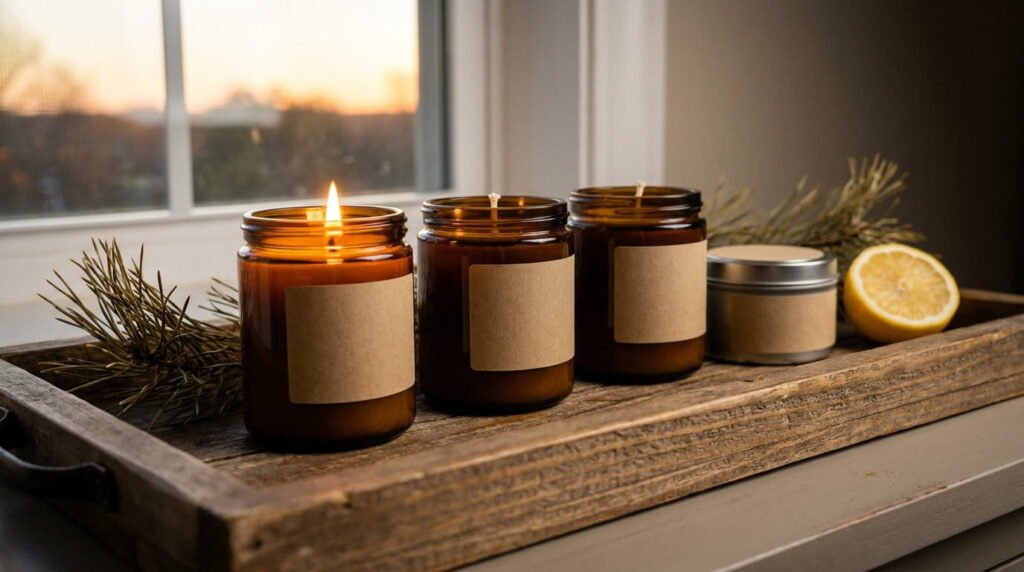
5. Hand-Poured Travel Scented Soy Candles
Scent is the most underrated souvenir. A candle poured to match the place you visited (salt air, pine forest, citrus grove) brings the memory back every time you light it. These are simple enough to count among the easiest homemade gifts you can make in bulk.
Materials Needed:
- Soy wax flakes
- Cotton wicks and wick stickers
- Fragrance oil matched to your destination
- Heatproof pouring pitcher
- Clean jars or tins (travel-themed labels optional)
How-To Steps: Melt the soy wax in a double boiler to about 185°F, then stir in fragrance oil once off the heat. Secure a wick centered in each jar with a wick sticker, pour the wax, and let cool undisturbed for several hours. Trim the wick to a quarter inch before the first burn.
Styling/Placement Tip: Line up three to five jars on a tray by destination. It turns a scattered collection into a cohesive display and makes an easy hand made gifts set for a travel-loving friend.
6. Custom Embroidered Destination Coordinates Pillow
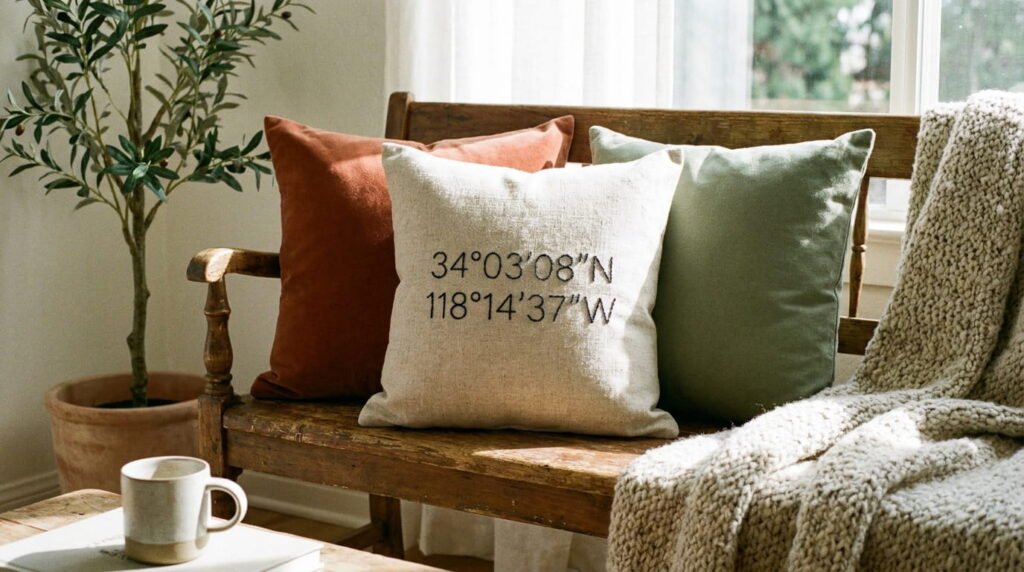
A throw pillow stitched with the latitude and longitude of a meaningful place is understated and personal, the kind of detail guests ask about without it screaming “souvenir.”
Materials Needed:
- Plain linen or cotton pillow cover
- Embroidery hoop, needle, and floss
- Water-soluble fabric pen
- Pillow insert
How-To Steps: Write out the coordinates and destination name lightly on the fabric with the fabric pen, then hoop the section tight. Stitch over the pen lines using a simple backstitch for text, and rinse away any remaining marking once finished. Insert the pillow form and close the cover.
Styling/Placement Tip: One embroidered pillow reads as a design choice; a whole set of them from different trips starts to feel like a scrapbook, so mix it with solid-color pillows instead.
7. Memory Jar Terrariums with Local Soil & Stones
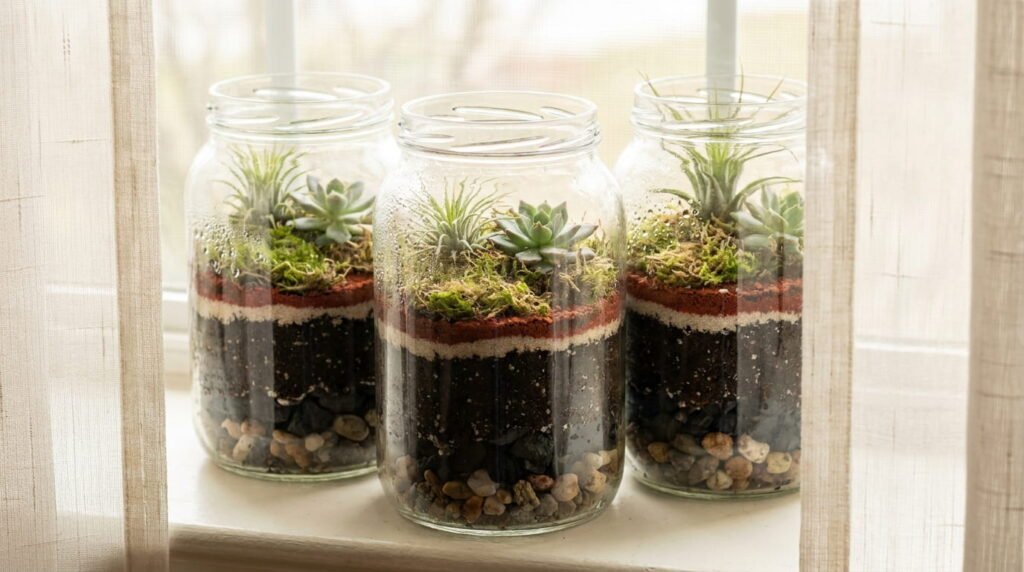
A small terrarium built with soil, sand layers, or stones collected on a hike keeps a literal piece of a place alive on your windowsill. Of all the handmade gifts on this list, this is the one that keeps growing after you’ve made it.
Materials Needed:
- A clear glass jar or jar with a wide mouth
- Small pebbles for drainage
- Activated charcoal
- Potting soil (and local soil/sand for layering)
- A small low-light plant (moss, succulent, or air plant)
How-To Steps: Layer pebbles, then a thin layer of charcoal, at the bottom of the jar for drainage. Add potting soil mixed with a thin visible layer of your collected local soil or sand along the glass for a striped effect. Nestle in your plant, mist lightly, and keep in indirect light.
Styling/Placement Tip: Cluster two or three terrariums from different trips together. The varying soil colors do the storytelling without any extra labels.
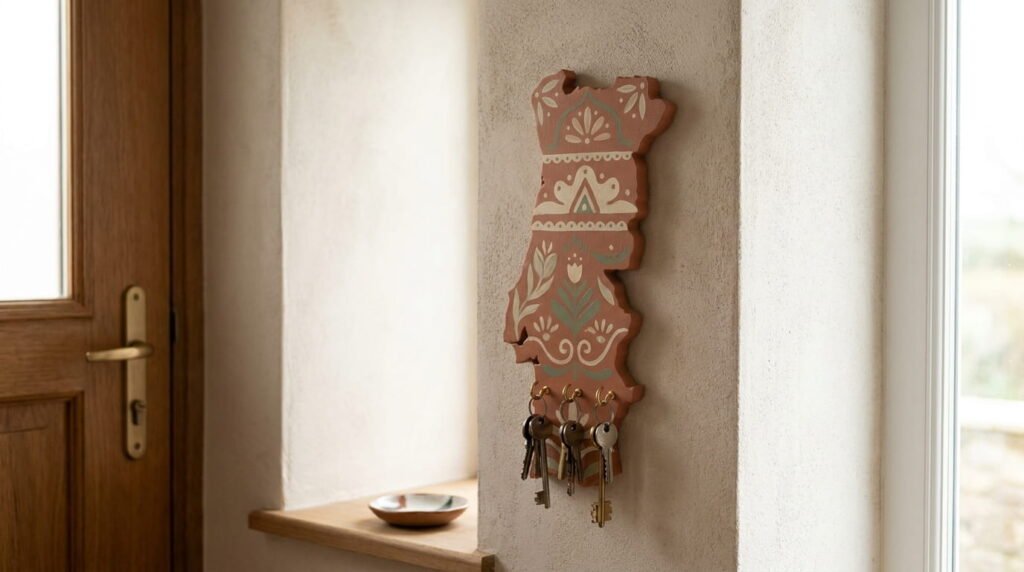
8. Hand-Painted Wooden Map Key Holders
A small wooden cutout of the country or city you visited, hand-painted and fitted with hooks, turns an everyday catch-all into a conversation piece by the front door.
Materials Needed:
- Thin plywood or a pre-cut wooden shape
- Acrylic paint matched to your trip’s palette
- Small screw hooks (2–4)
- Sawtooth hanger
- Sandpaper and sealant
How-To Steps: Sand the wood smooth, then paint the base shape and let dry fully between coats. Mark and pre-drill holes for your hooks before screwing them in, spacing them evenly along the bottom edge. Attach a sawtooth hanger on the back and seal the front with a matte varnish.
Styling/Placement Tip: Mount it at eye level by the entryway: functional pieces like this earn their spot in high-traffic areas that purely decorative items don’t. It also gives your keys a spot, which is the easiest way to give everything a permanent home.
Cozy Shelf & Tabletop Display Crafts
Small-format crafts like these are perfect for bookshelves, mantels, and any surface that needs a little warmth without extra bulk.
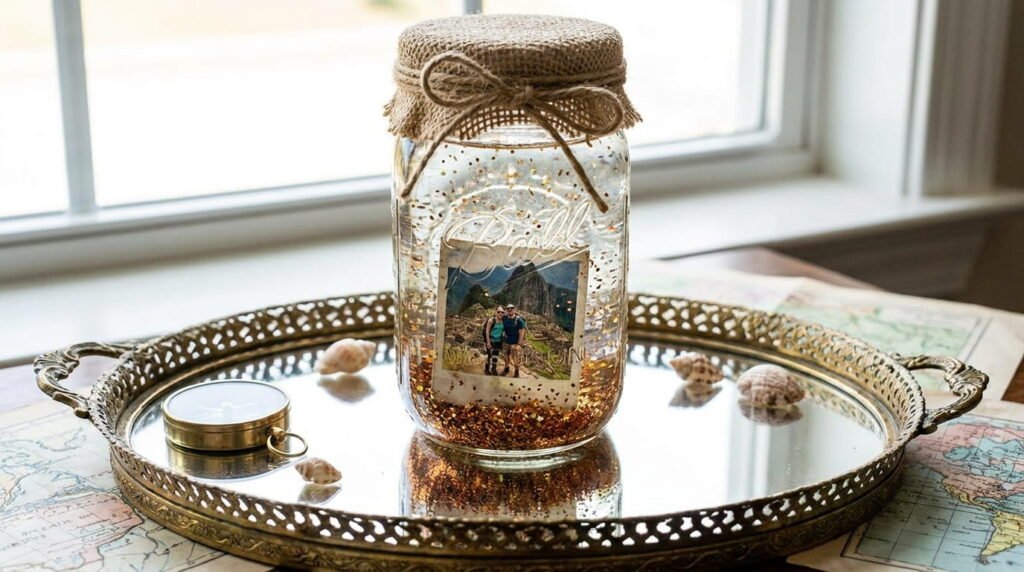
9. Photo & Ticket Keepsake Snow Globes / Memory Globes
A custom memory globe built around a tiny printed photo and a rolled ticket stub feels more special than anything you’d buy in an airport gift shop, and it’s genuinely one of the more charming diy presents on this list.
Materials Needed:
- A clear glass jar with a tight lid
- Distilled water
- Glycerin
- Fine glitter (optional)
- Waterproof glue
- A small printed photo and miniature figurine or object
How-To Steps: Glue your photo or figurine securely to the inside of the lid and let the adhesive cure fully; this step can’t be rushed. Fill the jar with distilled water, a few drops of glycerin, and a pinch of glitter if using. Screw the lid on tightly, seal the rim with waterproof glue, and flip to test.
Styling/Placement Tip: Display on a small mirrored tray so the light bounces through the water and catches the glitter from more angles.
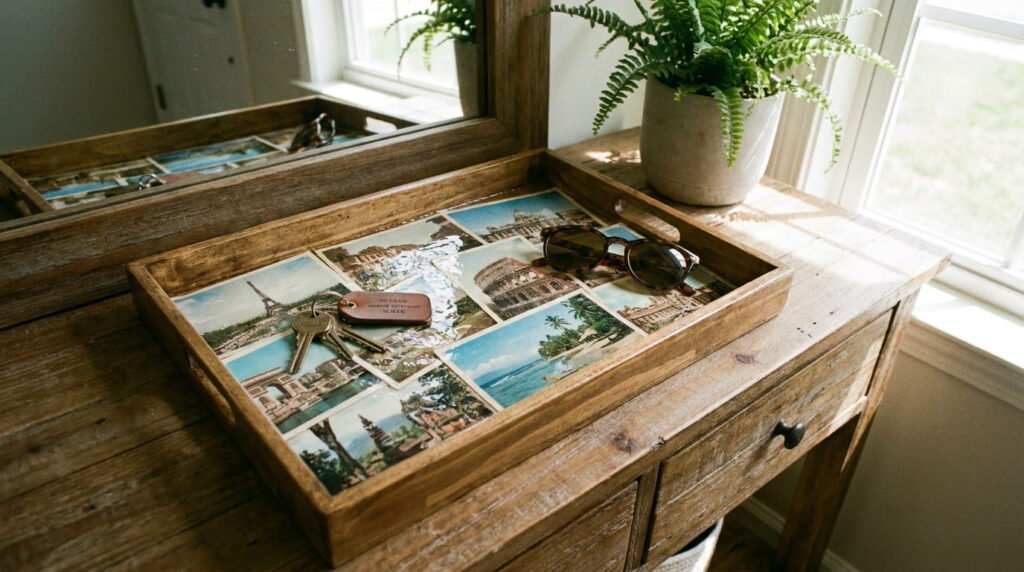
10. Decoupage Photo Memory Trays
An old wooden or cork tray gets a second life as a photo-covered catchall for keys, jewelry, or loose change by the door.
Materials Needed:
- A plain wooden or cork tray
- Printed travel photos (trimmed to size)
- Decoupage medium (like Mod Podge)
- Foam brush
- Clear sealant spray
How-To Steps: Arrange trimmed photos on the tray surface in a layout you like, then brush decoupage medium underneath and over each photo to seal it down. Smooth out air bubbles as you go and let dry fully between coats, applying two to three coats over the top. Finish with a clear sealant spray for durability.
Styling/Placement Tip: Keep it functional, not just decorative. A tray that holds your actual keys and sunglasses gets noticed daily instead of gathering dust.
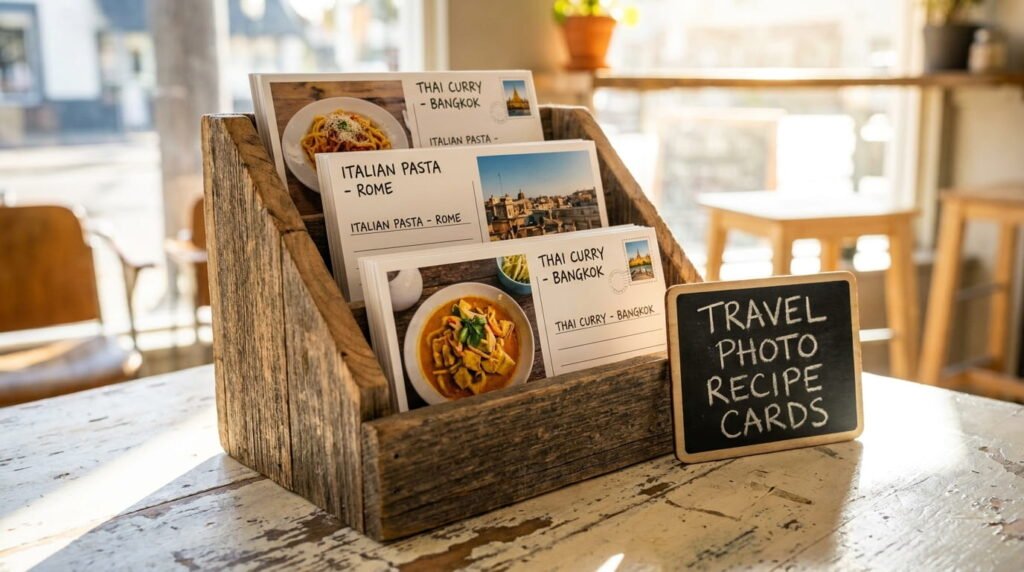
11. Custom Travel Photo Recipe Cards & Stand
If you picked up a recipe on your travels, a pasta dish from Rome, a spice blend from Marrakech, turning it into a printed card with a photo backdrop is one of the easy homemade gifts ideas anyone who cooks will actually use.
Materials Needed:
- Cardstock or recipe card blanks
- A printed travel photo per recipe
- A small wooden or metal recipe card stand
- Fine-tip pen or printer
How-To Steps: Write or print the recipe on one side of the card and a small travel photo on the reverse. Trim to a consistent size so a full set looks uniform, then slot into the stand on the counter. Laminate if you want them splash-proof near the stove.
Styling/Placement Tip: Keep the stand near where you actually cook. It turns meal prep into a small daily trip back to that place.
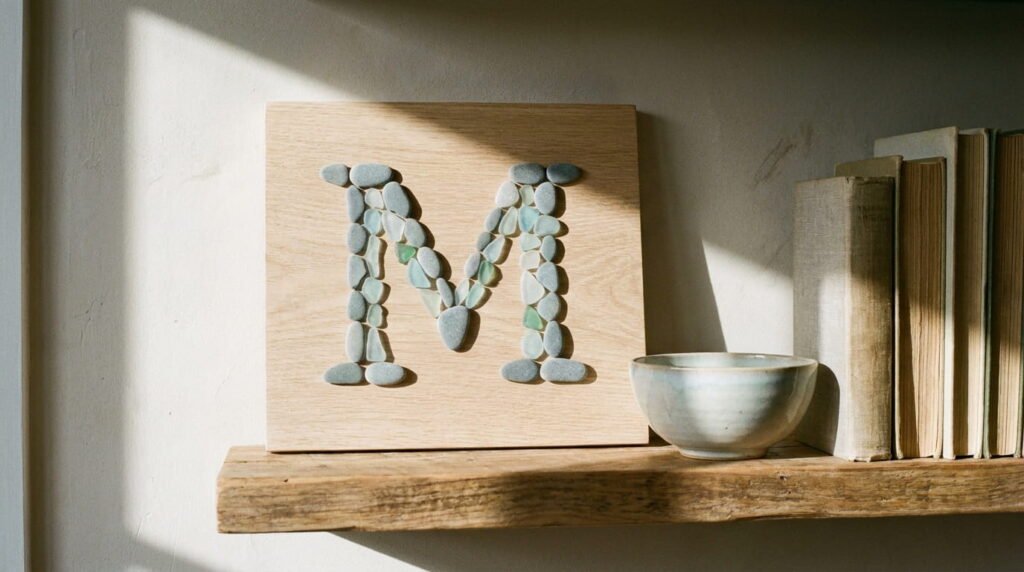
12. Pebble & Sea Glass Monogram Art
Smooth stones and sea glass collected from a single beach, arranged into an initial or short word, make quiet, textural wall or shelf art.
Materials Needed:
- Flat pebbles and sea glass pieces
- A wood board or canvas base
- Strong craft glue
- Pencil for sketching the layout
How-To Steps: Sketch your initial or word lightly on the base first. Dry-arrange stones and glass along the lines until the shape reads clearly, adjusting size and spacing. Glue each piece down one at a time, working from the outline inward.
Styling/Placement Tip: Lean it against the wall on a shelf rather than hanging it. The slight angle shows off the texture better than flat-mounted art does.
Textile & Fabric Memory Displays
Fabric-based crafts add softness to a room and are forgiving for beginners, since small imperfections tend to disappear into the material.
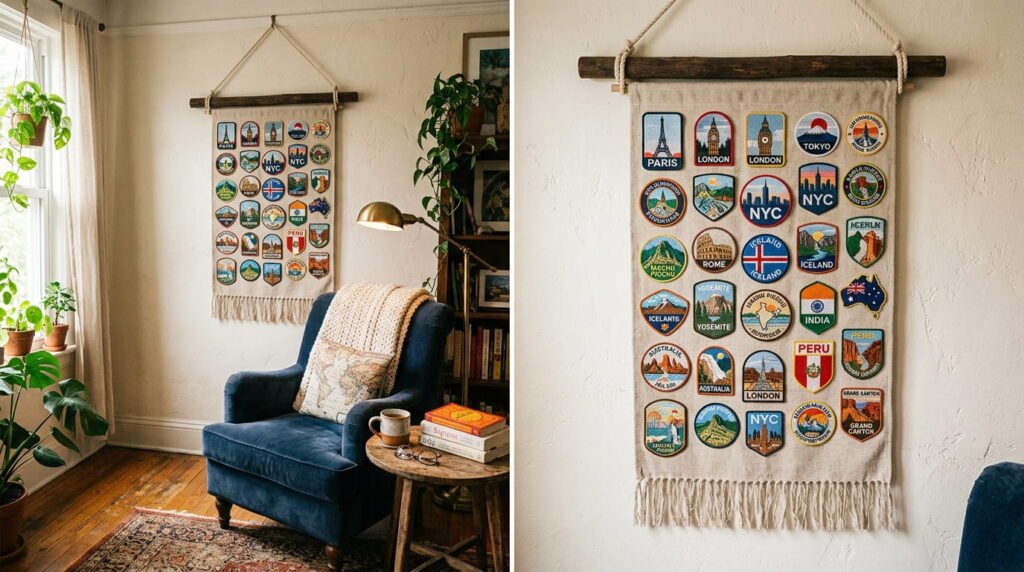
13. Travel Patch & Tote Fabric Wall Hangings
If you collect embroidered patches from every destination, sewing them onto a canvas tote or a strip of fabric and hanging it on a dowel turns a drawer of patches into a genuine wall hanging.
Materials Needed:
- Embroidered travel patches
- A canvas tote or plain fabric strip
- Needle and thread (or fabric glue)
- A wooden dowel
- Twine for hanging
How-To Steps: Arrange your patches on the fabric in a pleasing layout before attaching anything. Sew or glue each patch in place, working methodically so nothing puckers the fabric. Fold the top edge over a dowel and stitch a channel to hold it, then tie twine to each end for hanging.
Styling/Placement Tip: Let it hang somewhere low-traffic, like above a reading chair. The patches read better up close than from across a room.
14. Custom Stamped Travel Journal & Book Covers
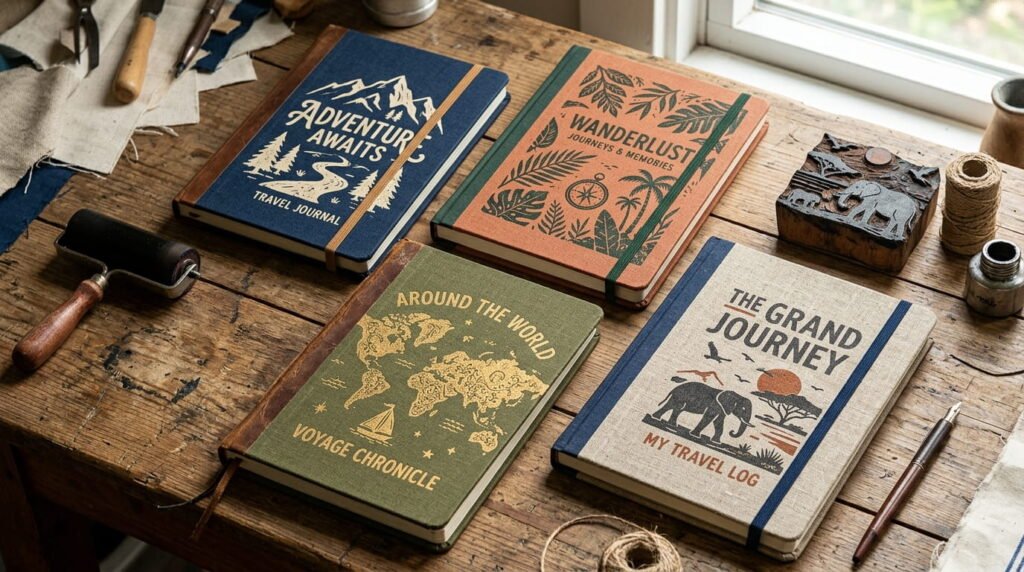
A plain notebook or the cover of a well-loved book gets a custom refresh using carved stamps inspired by a destination’s landmarks or motifs.
Materials Needed:
- A plain fabric or leather notebook cover
- Carving block and linoleum cutter
- Fabric or archival ink pad
- Scrap fabric for test prints
How-To Steps: Sketch a simple motif (a mountain outline, a wave, an architectural shape) onto the carving block, then carve away the negative space. Test the stamp on scrap fabric first to check ink coverage. Once you’re happy with it, stamp the design directly onto the notebook cover and let the ink cure fully before handling.
Styling/Placement Tip: Stack a few stamped journals on a shelf with their spines out. The repeated motif across covers looks like a designed set, not a craft project.
15. Commemorative Travel Photo Garland
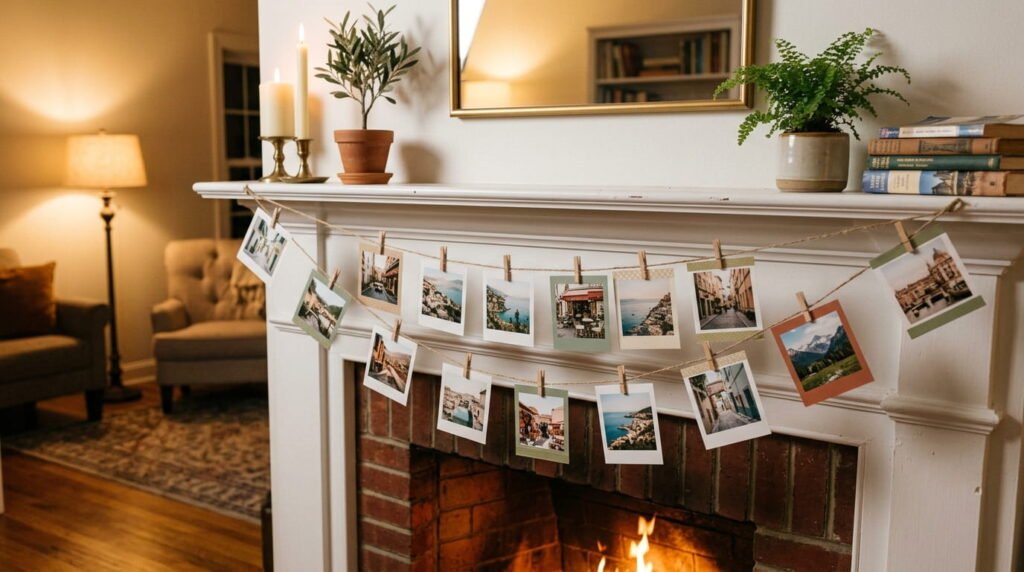
A simple string of small printed photos clipped along twine is one of the fastest projects on this list and makes genuinely lovely presents homemade for someone who just got back from a big trip. It also doubles as one of the most flexible homemade gift ideas, since it scales from a single short trip to years of travel.
Materials Needed:
- Small printed travel photos (postcard-sized or smaller)
- Twine or thin cord
- Mini wooden clothespins
- Washi tape (optional, for photo borders)
How-To Steps: Print or reprint your favorite travel photos at a small, consistent size. String the twine across the space where it’ll hang, then clip each photo on with a mini clothespin, spacing them evenly. Add washi tape borders if you want a bit more color between photos.
Styling/Placement Tip: Drape it along a mantel or above a headboard rather than pinning it flat. A slight sag in the twine gives it a relaxed, gallery-string look.
How to Style Homemade Souvenirs Without Creating Visual Clutter
The difference between a thoughtfully styled display and a cluttered one usually comes down to three habits: grouping, preservation, and color discipline. Overcrowding a shelf is one of the common home organization mistakes, so edit before you display.
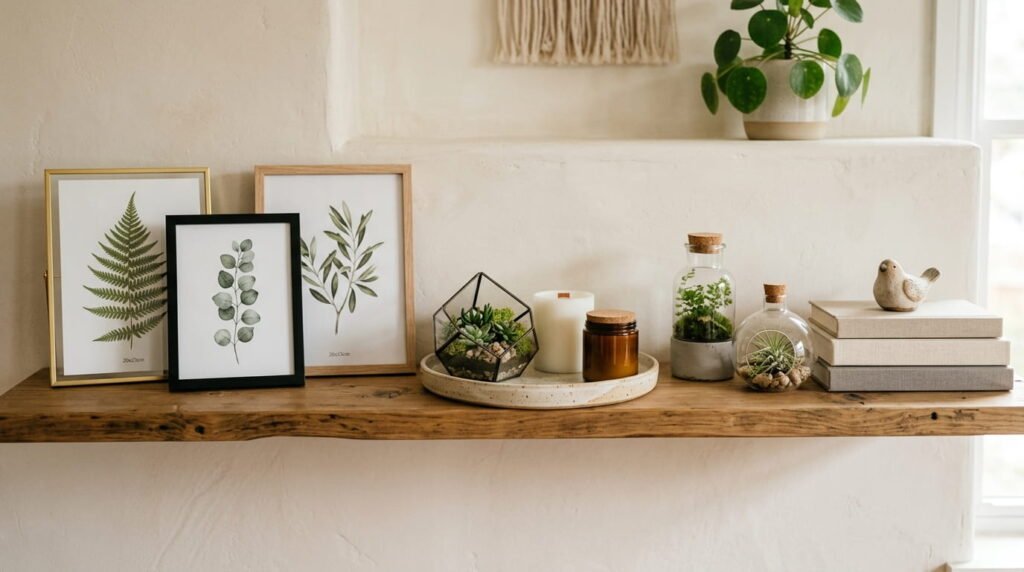
Use the rule of threes. Souvenirs read as intentional when they’re grouped in odd numbers: three framed botanicals, three candles on a tray, three terrariums on a windowsill. Odd-numbered groupings create natural visual triangles that the eye reads as composed rather than scattered. If you have more than three related pieces, break them into two smaller groupings instead of one crowded shelf.
Protect what fades. Paper, photos, and pressed botanicals are vulnerable to UV damage, which is why UV-protective glass is worth the upcharge on any frame going near a window. For resin projects, use a UV-resistant resin formula to prevent yellowing over time, and for paper-based crafts, stick with acid-free glue and cardstock so nothing degrades or discolors within a year.
Match your existing palette. The fastest way to make a handmade piece look store-bought is to keep its materials in conversation with the room it’s in. If your living room leans neutral and warm, choose frame finishes, fabric, and paint colors that stay within that same family rather than introducing a totally unrelated accent color. A single bold piece can anchor a room, but a dozen clashing souvenirs will fight each other for attention.
One more habit worth adopting: rotate what’s on display. You don’t need every souvenir out at once. Keeping a seasonal rotation of two or three pieces per shelf, with the rest tucked into small home storage ideas like flat under-bed bins, keeps the display feeling fresh instead of accumulated.
Frequently Asked Questions
How do I display souvenir sand without making a mess?
Seal it. Layering sand into clear resin (as in the coaster project above) or a glass jar with a tight lid are the two most mess-free options. Avoid open dishes of loose sand on display. They shed with every bump and are difficult to keep looking fresh over time.
What are the easiest travel souvenir crafts for beginners?
Memory jar terrariums, photo garlands, and recipe cards are the most forgiving starting points: none of them require special tools, precise cutting, or a long cure time. Save resin coasters and embroidery projects for once you’ve got a project or two under your belt.
How can I make travel souvenir crafts look high-end rather than homemade?
Stick to a limited color palette, invest in good frames and mounting materials even for simple crafts, and avoid overcrowding any single display. The materials you frame something in, and the restraint you show in how much you put on one shelf, matter more to the finished look than the complexity of the craft itself.
Bring Your Journey Home
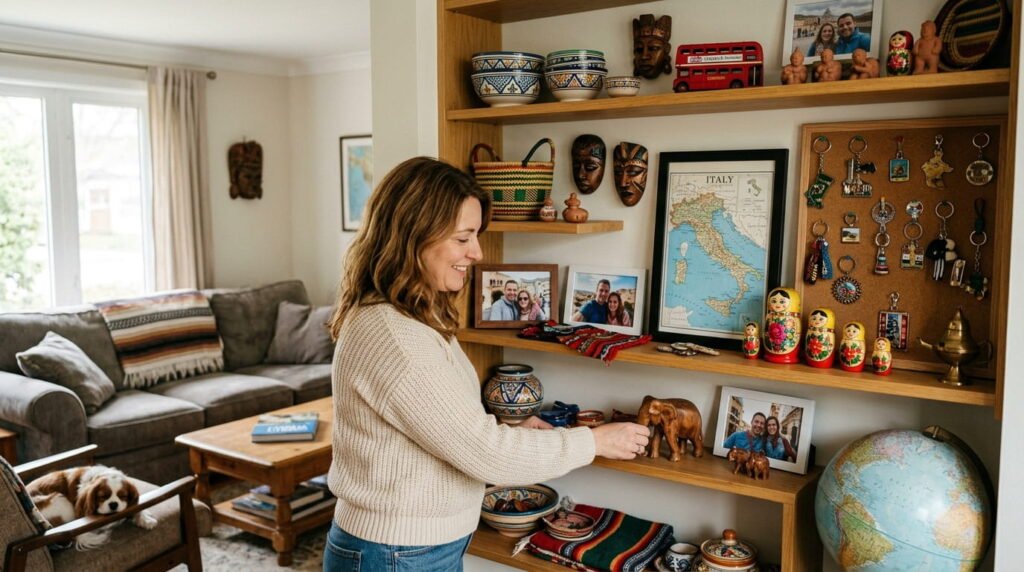
The best souvenirs aren’t the ones boxed up in a closet. They’re the ones woven into the rooms you live in every day. Start with one project from this list of homemade souvenir ideas, maybe the easiest option here like the photo garland or recipe cards, and let your collection grow one trip at a time. Before long, your home will hold its own kind of travel journal, one that guests actually notice and ask about, and a few of these make lovely presents, handmade for whoever shared the trip with you.
For more ways to bring personality into your space, take a take a look at our guides to home decor essentials, living room wall styling, and home organization. They pair naturally with everything on this list, from framed collages to the shelf-top crafts above.


Leave a Reply