Introduction
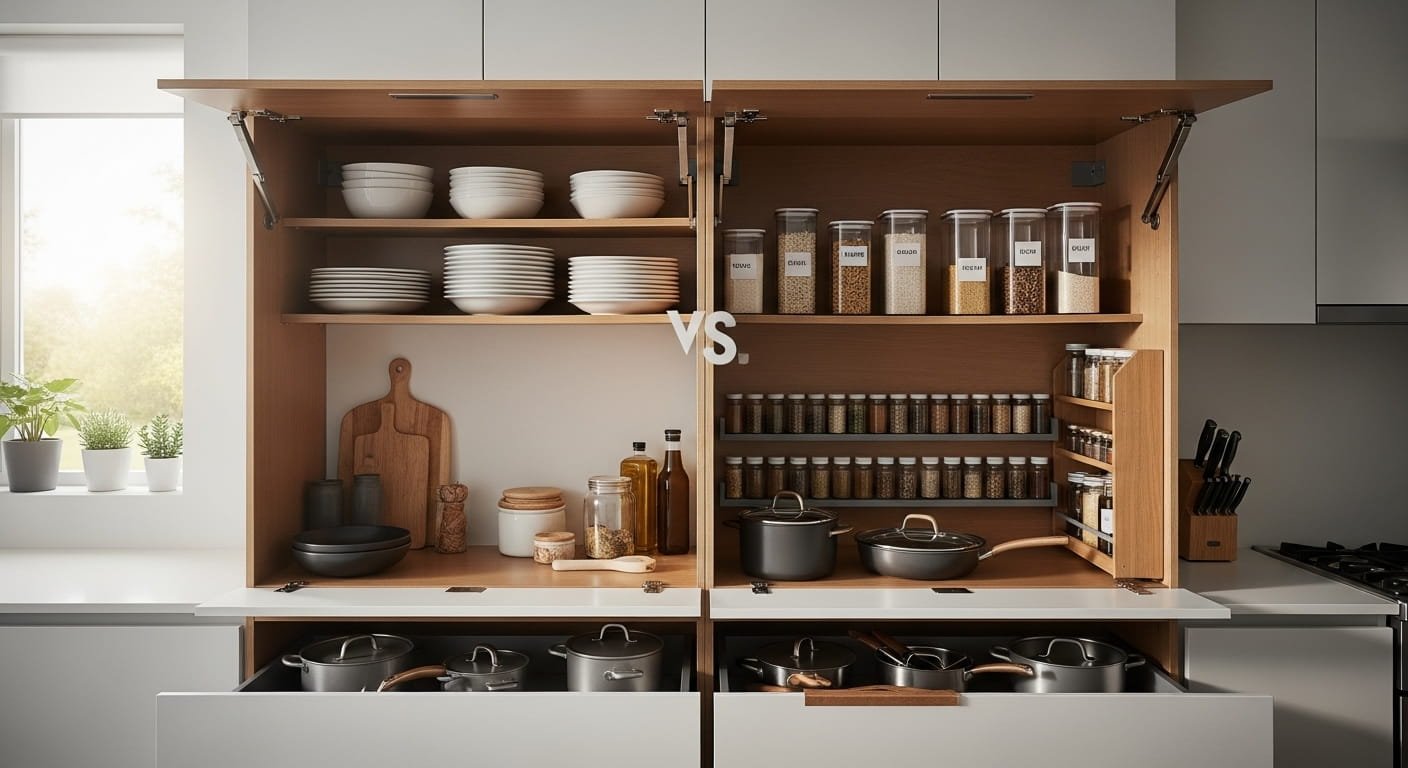
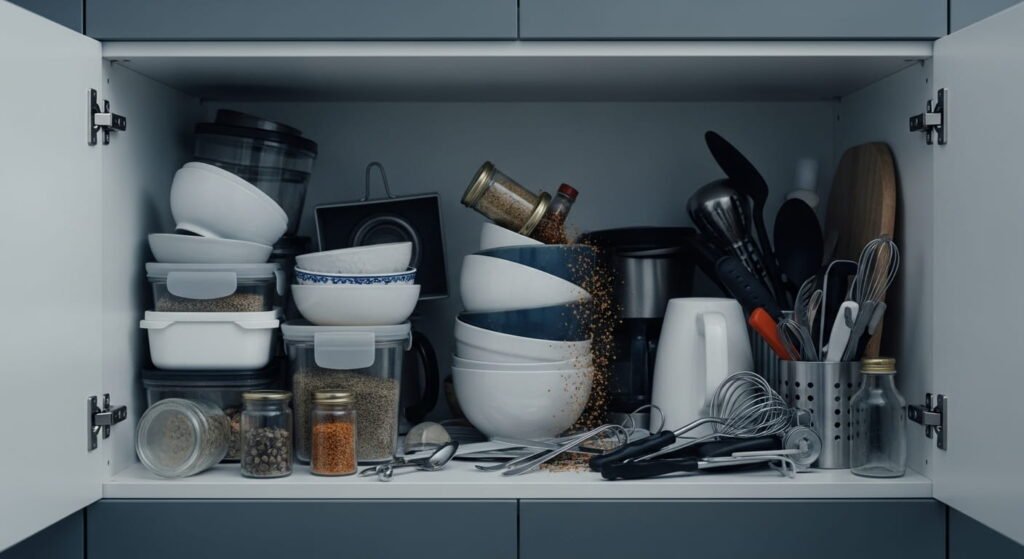
There is a specific kind of quiet inefficiency living inside most family kitchen cabinets, and it looks completely fine from the outside. Doors close. Things are technically stored. But open any cabinet and the real picture appears: the mixing bowl that requires moving four things to reach, the spice that falls out every single time, the lower cabinet that becomes a ten-second excavation every time you need a pot.
The problem is almost never a lack of cabinet space. It’s that the space is organized around the order things were put away rather than the order they get used. Whoever put the pasta maker in the front-center spot four years ago probably just set it down and never moved it. It’s been blocking the colander ever since.
Efficient cabinet organization is not about fitting more into the same space by some feat of geometric genius. It’s about a clear, logical system where every item’s location reflects how frequently it gets used, who needs to access it, and where in the kitchen it gets used. When those three factors align, cabinets become fast and intuitive. When they don’t, cabinets become a daily friction point dressed up as furniture.
This guide gives you a step-by-step process to fix that, one cabinet at a time.
Step 1: Preparation – Empty and Declutter Every Cabinet First
Before touching a single organizer or rearranging a single shelf position, every cabinet gets emptied. Completely.
This step feels excessive until you do it. Once everything is out and on the counter or table, you see the full picture of what your kitchen actually contains, which is almost always significantly more than what felt like it was in there. Adhering to smart food storage rotation principles right from the start ensures that older pantry staples are moved forward and clearly cataloged during this empty-out phase, saving you money and preventing future waste.
What to remove permanently before reorganizing: Work through everything using the questions from the Small Kitchen Organization Ideas guide’s kitchen declutter framework. For cabinets specifically, focus on:
- Appliances not used in the last 90 days
- Duplicate tools (you need two spatulas, not five)
- Containers with no matching lid, cracked containers, or containers in sizes you never actually use
- Dishes or mugs beyond your realistic household capacity plus guests
- Ingredients in the back of the pantry cabinet that expired before anyone noticed they existed
- Items that don’t belong in the kitchen at all but ended up there during some previous reorganization
Set four physical zones in your workspace during this step: Keep, Donate, Trash, Relocate. Everything gets assigned to one of the four before anything goes back into a cabinet. The Relocate pile is for items that belong in your home but not in the kitchen, things like the dog medication sitting in the cabinet beside the glasses, or the birthday candles in the pot drawer.
Complete this step fully before moving to any of the following steps. Reorganizing cabinets that still contain things that shouldn’t be there is reorganizing the wrong problem.
Step 2: Define Your Cabinet Map Before Putting Anything Back
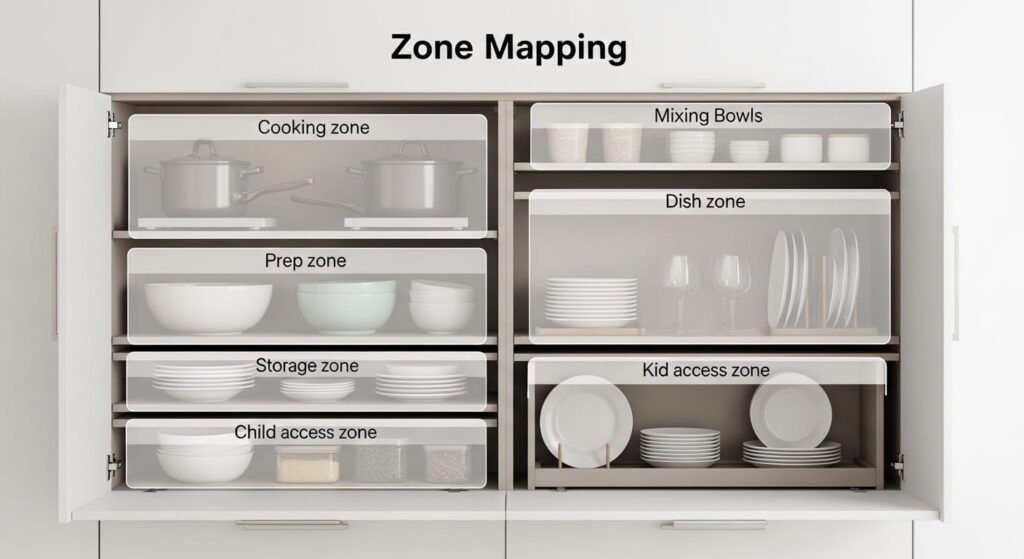
This step takes 15 minutes and prevents 6 months of cabinet frustration. Before any item returns to any cabinet, decide which cabinet belongs to which category based on a single guiding principle: things live where they get used.
Draw a quick sketch of your kitchen or just mentally walk through it and assign each cabinet a category. A practical assignment guide for most family kitchens:
Cabinets directly beside or above the stove: Cooking zone. Pots, pans, cooking oils, spices, oven mitts, and frequently used cooking tools live here. Reaching for what you need while cooking should require one step at most.
Cabinets beside or above the main prep counter: Prep zone. Mixing bowls, measuring cups, cutting boards, and baking items live here. The connection between prep tools and prep surface should be immediate.
Cabinets near the dishwasher or drying area: Dish zone. Plates, bowls, glasses, and everyday serving items live here. The path from cleaned dish to storage should be the shortest one in the kitchen.
Lower cabinets on the far side or pantry area: Storage zone. Bulk items, infrequently used appliances, large cookware, and deep pantry staples live here. These cabinets hold things you access less often, so slightly more friction is acceptable.
One dedicated low cabinet: Kid zone. Kids’ plates, bowls, cups, and snack items at a height kids can reach independently. This single change reduces the number of times children ask for help during meals and snack times dramatically.
Once you’ve made these assignments on paper or in your head, do not put anything back until you’ve committed to the map. The map is the system. Everything else is execution.
Step 3: Upper Cabinet Optimization
Upper cabinets in most kitchens hold lighter, frequently used items like dishes, glasses, mugs, and dry goods. The efficiency problem is almost always vertical: the cabinet has 30 inches of height, the items inside use 12 of them, and the upper 18 inches hold nothing.
Fix the vertical gap first.
Inside any upper cabinet, install a stackable wire shelf riser or a tension-mounted second shelf to create two tiers. The bottom tier holds your current items at accessible height. The top tier holds the same categories of items used less frequently, the good glasses, the serving bowl used on weekends, the extra plates for guests.
This single addition typically increases upper cabinet capacity by 40 to 60 percent without adding a single new cabinet.
Stack plates and bowls strategically.
Everyday plates and bowls stack flat and take up minimal space when stacked by size. The problem arises when differently sized items get mixed in a single stack. Sort by size, stack neatly, and keep the most-used size at the front of the shelf. The good serving dishes go to the rear or to the newly created upper tier.
Mugs need a hard limit.
The mug situation in most family cabinets is a case study in unchecked accumulation. Establish a firm household mug limit. A family of four needs eight mugs maximum (daily use plus guests). Everything beyond that donates. Mugs hung from a mounted under-cabinet rack take zero shelf space and make the cabinet look organized by default.
Step 4: Lower Cabinet Solutions
Lower cabinets present different challenges than upper ones. Items are heavier, the depth is greater, and the back of a lower cabinet might as well be another zip code in terms of accessibility.
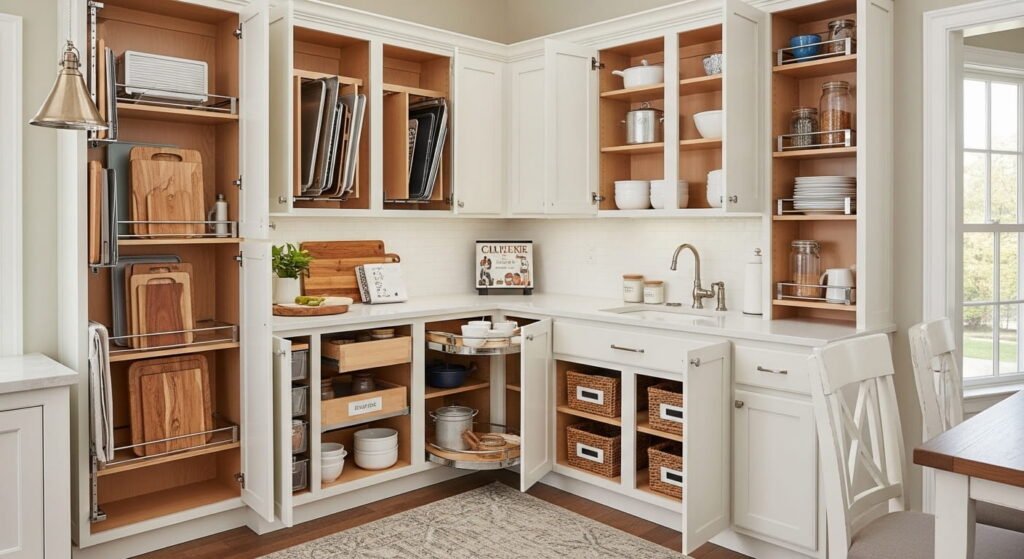
The pull-out organizer is the single most effective lower cabinet upgrade. A two-tier pull-out that mounts to the cabinet floor and slides forward when you open the door brings every item into full view. No more crouching and reaching. No more removing the front pot to access the back one. Families consistently describe this as the most impactful single kitchen organizer purchase they’ve made.
For cabinets where a pull-out isn’t the right fit, apply these three techniques instead:
Categorize by depth. Items used daily live within the first 8 inches (the front row). Items used several times a week live in the middle. Items used occasionally live in the back. Respect this arrangement every time something goes back in, and the cabinet stays accessible without effort.
Stand flat items vertically. Baking sheets, cutting boards, pot lids, and sheet pans stored flat require removing everything above to access the bottom one. Stored vertically in a slot organizer or between tension rods, every item is independently accessible in under 3 seconds. This is not a marginal improvement. It is a fundamental change in how a cabinet functions.
Use turntables for deep lower shelves. A lazy Susan on a deep lower cabinet shelf means a single spin brings every item to the front. Oils, vinegars, canned goods, and sauces that used to disappear into the back of the cabinet suddenly become visible and accessible with no excavation required.
Corner Cabinet Solutions
Corner cabinets are the most frustrating storage spaces in most kitchens. Their depth and angle make standard organization nearly impossible, and most families eventually stop using the back half of them altogether.
Three approaches that actually work for corner cabinets:
A blind corner pull-out system (available at most kitchen stores for $40 to $80) uses a hinged mechanism to bring the back section forward when the door opens. It’s the most functional solution and worth the cost in cabinets you’ve essentially given up on.
A lazy Susan turntable insert ($20 to $35) mounted inside the corner cabinet allows the full depth to spin into view. Less complete than a pull-out system but significantly better than a static shelf.
For the most budget-constrained option, simply designate the corner cabinet as long-term storage, appliances and items used seasonally, and organize the accessible portion of the corner with a standard riser. Accept that the deep back corner holds your stand mixer and your dutch oven, accessed a few times a month, rather than fighting the corner’s geometry daily.
Step 5: Deep vs. Shallow Cabinet Strategies
Cabinet depth varies significantly, and the right organization approach differs for each.
Shallow cabinets (10 to 12 inches deep) are naturally easier to organize because nothing hides behind anything else. The main challenge is height. Use stackable shelf risers to maximize the vertical space, and keep only the relevant category in each shallow cabinet without overflow from other zones.
Deep cabinets (18 to 24 inches) are where most kitchen organization problems live. The back 8 to 10 inches are essentially inaccessible without deliberate strategy. Three non-negotiable rules for deep cabinets:
- Everything in the back must be something used rarely or in bulk quantity (you’ll eventually work through the bulk)
- Use a lazy Susan, pull-out organizer, or tiered riser to create front-to-back visibility
- Label the back row. If you can’t easily read what’s back there, it will be forgotten and wasted
Step 6: Labeling and Categorization
Labels are not decorative. In a family kitchen, they are the difference between a system that maintains itself and one that requires constant correction.
What to label and how:
Pantry shelves get simple shelf labels indicating what category belongs there: grains and pasta, canned goods, baking supplies, snacks, kids’ items. When someone puts groceries away and a label says “canned goods,” there’s no decision required about where the can goes. Decision fatigue in routine tasks is real, and labels eliminate it.
Clear pantry canisters get labels on the lid and the front. Lid labels are read when the canister is stacked. Front labels are read when it’s on the shelf at eye level. Both covers all orientations the canister might be in.
Kids’ cabinets and snack zones get picture-plus-word labels for younger children. A child who can read the label independently is a child who can put their things away independently.
A word on label style: Chalkboard labels, printed labels, and handwritten masking tape all work. The style matters far less than the consistency. A kitchen where some cabinets are labeled and some aren’t is a kitchen where the unlabeled ones slowly revert to catch-all status.
Step 7: Family-Friendly Cabinet Setup
A cabinet organization system that only one adult understands will not be maintained by anyone else. The design of the system needs to account for everyone who uses the kitchen.
For kids aged 5 to 10: Their cabinet (plates, bowls, cups, snacks) should be a lower cabinet or the lowest shelf of any cabinet. Completely within reach. No climbing, no asking for help. When kids can manage their own kitchen items independently, the daily kitchen coordination load drops noticeably for adults.
For kids aged 11 and up: They can access standard cabinet heights and can be responsible for a full zone. Assigning older kids ownership of the snack cabinet, including restocking it when it gets low, builds useful household skills and reduces the parental task load.
Heavy items belong in lower cabinets always. A 12-inch cast iron skillet in an upper cabinet is a safety hazard waiting for the right moment. Heavy pots, appliances, and bulk items stay low. Light items (plates, glasses, dry goods) go up. This is not just practical organization. It’s basic household safety with kids around.
Step 8: Long-Term Cabinet Maintenance
The most common reason a cabinet organization system fails over time is not that people stop caring. It’s that the system was set up once and never adjusted as household needs evolved.
A monthly 5-minute cabinet check is all the maintenance most kitchens need. During this check, ask three things:
Is everything returning to its assigned category, or is drift starting to happen in one area? Fix the drift immediately before it compounds.
Has any category outgrown its space? Overcrowded categories need either a declutter pass or a reassignment to a slightly larger cabinet zone.
Are there any items sitting in the cabinet that no longer belong there, either because they’re expired, broken, or the family has stopped using them? Remove them on the spot.
Beyond the monthly check, the one daily habit that keeps cabinet organization intact is simple: put things back in their designated spot every time, not approximately in the right area. In the right spot. The 3 seconds this takes is the entire maintenance cost of a functional cabinet system.
Conclusion: Cabinets That Actually Work for Your Family
Efficient kitchen cabinets are not about perfection. They’re about a logical system that everyone in the household can follow, that keeps daily cooking flowing smoothly, and that doesn’t require a Saturday reorganization every few months to stay functional.
Empty everything, declutter honestly, assign zones based on actual use patterns, optimize the vertical space you’re not using, solve the specific challenges of your lower and corner cabinets, and label everything clearly enough that any family member can maintain it without asking where things go.
Do all of that and your kitchen cabinets become one of the most consistently satisfying parts of your home. Things are found in under 5 seconds. Cooking prep flows. The morning rush navigates the kitchen instead of fighting it.
For a complete guide to every aspect of kitchen organization beyond just the cabinets, the Small Kitchen Organization Ideas guide is the full system. And if your biggest storage challenge is the lack of cabinet space itself, Kitchen Storage Without Cabinets gives you creative ways to create storage without adding a single new cabinet to your kitchen.
Also helpful: Best Kitchen Organizers for Small Spaces | Small Kitchen Organization Ideas | How to Declutter Your Home Fast | Small Home Storage Ideas


Leave a Reply