

Introduction
You have likely spent real time choosing your sofa, your rug, and the exact white on your walls. Then a baby shower comes along, and the usual party aisle offers foil banners, plastic tablecloths, and glitter that lives in your carpet for weeks. That is the host’s dilemma. You want a warm, elegant celebration, but most commercial baby shower decorations were made for rented halls, not lived-in homes.
The fix is the “Invisible Event” Rule. A well-staged shower should feel like an intentional extension of your home, not a plastic layer dropped on top of it. When guests walk in, they should think, “This room looks beautiful today,” not “This room was taken over.” To get there, follow three habits:
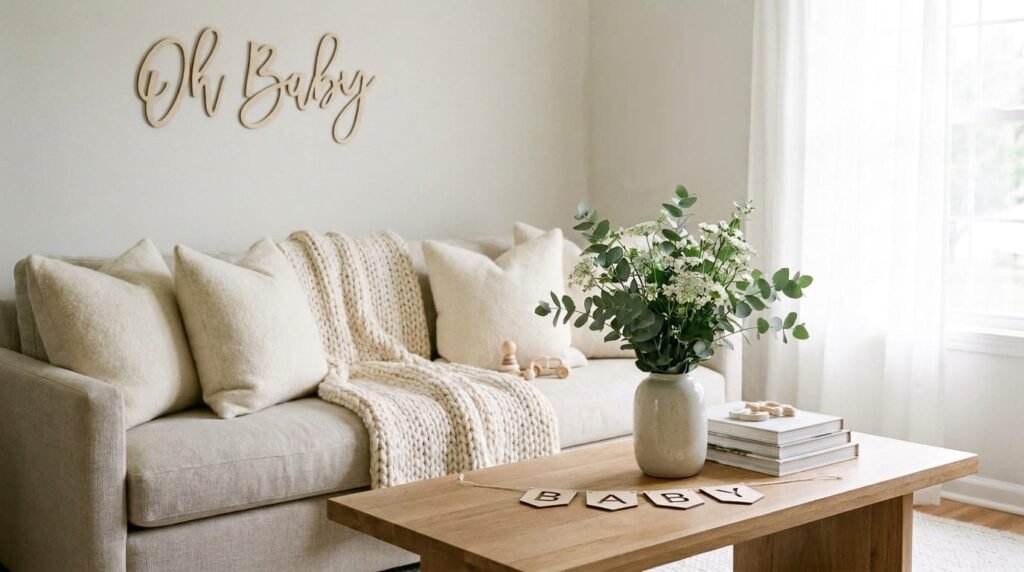
- Borrow your colors from what is already in the room, such as your rug, art, and throw pillows.
- Use the materials your home already speaks in, like wood, linen, brass, ceramic, and glass.
- Choose pieces with a second life, so they can stay in your home after the last guest leaves.
Below, you will find a layout plan that keeps guests moving, damage-free ways to hang and style your baby shower decor, and color palettes you can map across your living and dining areas. Every idea works for owners and renters alike, and every idea protects your walls, your floors, and your calm on the big day.
The Homeowner’s Blueprint: Planning Your Layout & Traffic Flow
Even the prettiest baby shower decorations cannot fix a crowded room. Plan the floor first, then style it.
Mapping the Space (Living Room & Open-Concept Layouts)
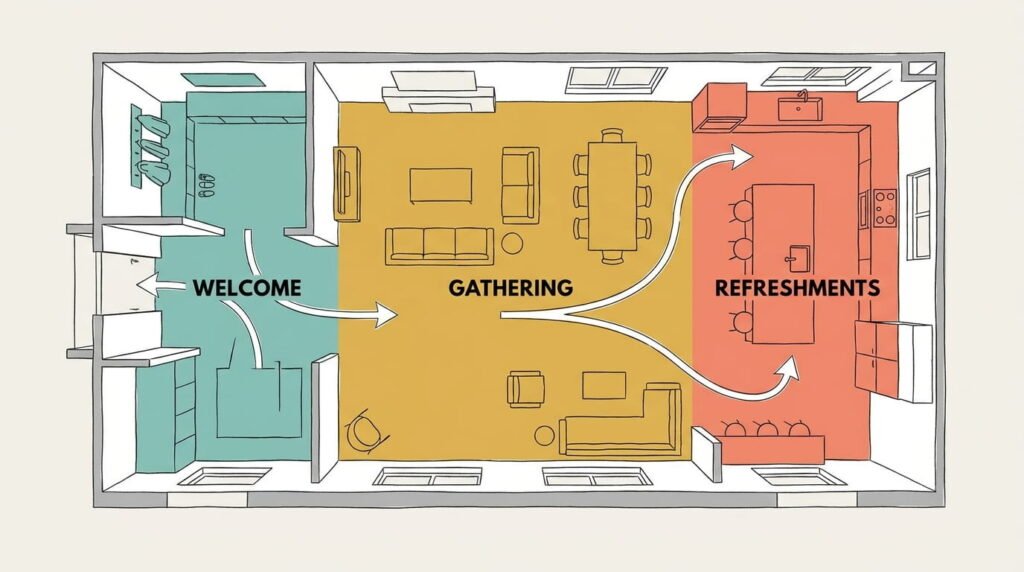
The 3-Zone Layout gives every part of the party a clear job, so guests always know where to go. It works in a classic living room and in an open-concept home where the kitchen, dining area, and lounge share one big space.
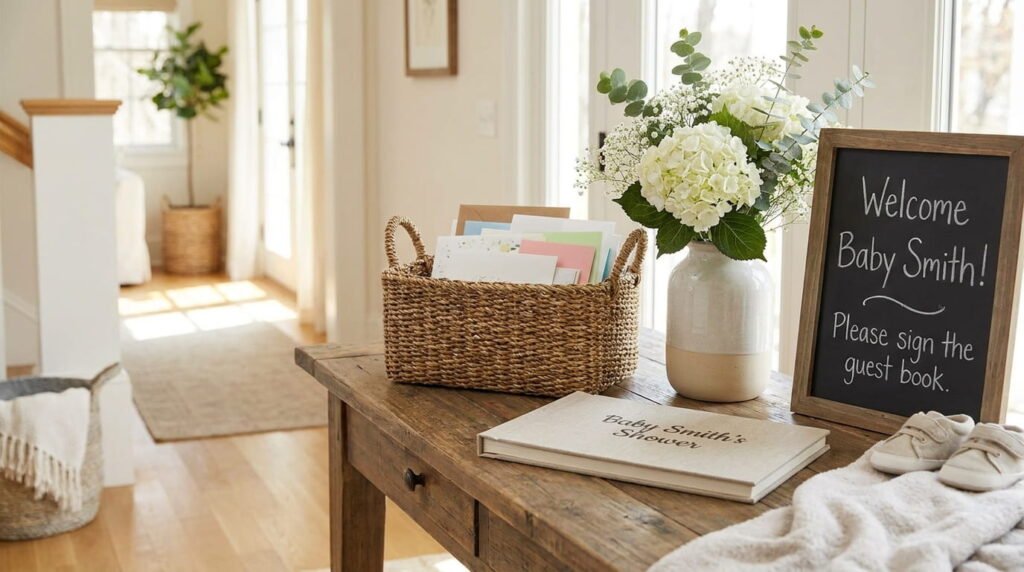
- Zone 1, Welcome: Set this up at the entry or just inside the door. A slim console or entryway storage unit holds a guest book, a tray of pens, a basket for cards, and one simple floral arrangement. Keep it tidy so people do not bunch up at the door.
- Zone 2, Gathering: This is your main seating area. Build small conversation groups of three or four seats instead of one large circle. Give the guest of honor a comfortable chair with a side table, and place the gift table within sight so everyone can enjoy the unwrapping.
- Zone 3, Refreshments: Use the dining table, a buffet, or the kitchen island. Keep it away from the entry and the main seating so guests move through the home. Set drinks in a separate spot from food to prevent lines.
How to rearrange without blocking walkways:
- Keep a clear path about 3 feet (36 inches) wide from the front door to each zone.
- Angle chairs inward to form cozy groups, and shift accent chairs so nothing sticks out into the main path.
- Move extras out for the day. Floor baskets, spare ottomans, and bulky plants can rest in a bedroom.
- Add small side tables so guests can set down plates and glasses instead of balancing them on their knees.
- Walk your route the day before while carrying a plate and a glass. If you bump into anything, move it.
Lighting & Atmosphere Staging
Lighting shapes the mood of the party and the look of your photos. Treat it as part of your baby shower decor, not an afterthought.
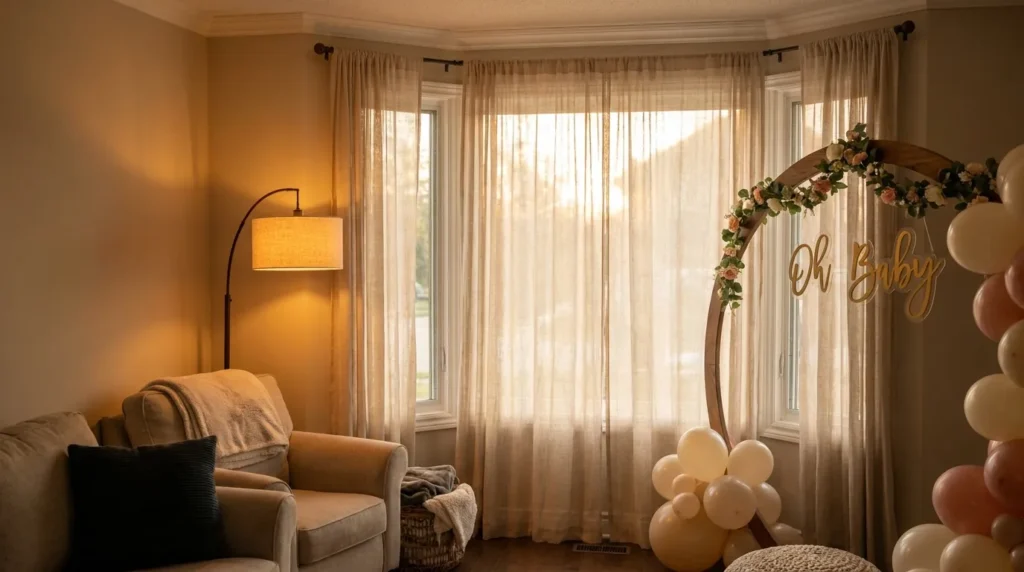
- Maximize window light for photos. Place your main photo spot near your biggest window, or at a right angle to it. Soft daylight flatters faces and colors better than a phone flash. If you can, schedule the shower between late morning and mid-afternoon.
- Layer warm floor lamps. Switch off harsh overhead lights and turn on two or three floor or table lamps. Look for bulbs labeled 2700K, which give a warm, golden glow. Place lamps in corners so the light pools low and feels cozy.
- Use soft drapery. Sheer linen curtains cut glare and spread daylight evenly. If your windows are bare, hang lightweight panels on a tension rod inside the window frame for the day.
Stylist’s note: Test your lighting a day early, at the hour your party will start. Sunlight moves, and a spot that looks perfect at noon can glare at three.
Damage-Free DIY Baby Shower Decorations for Indoor Spaces
You can create the look of a designed room without a single nail. From statement backdrops to custom balloon pillars, DIY decorations built on removable tools protect your paint, your trim, and your rental deposit. When styling DIY baby shower decorations, start with the right hanging method, then build your showpieces.
Damage-Free Hanging Techniques
- Tension rods: These spring-loaded rods lock in place between two surfaces, like inside a window frame or a doorway. Use them to hang linen panels, garlands, or a row of hoops. Choose a rod rated for the weight you plan to hang.
- Command picture hooks and strips: These work well for frames, a welcome sign, and light garlands. Clean the spot with rubbing alcohol and let it dry. Press each strip firmly for 30 seconds, then wait about an hour before hanging anything. To remove a strip, pull the tab slowly straight down along the wall. Always check the weight limit on the package and stay under it.
- Painter’s tape: Use low-tack painter’s tape for paper items and the edges of lightweight fabric. It is gentler than regular tape. Peel it back slowly at a low angle so it does not pull paint.
Protect your walls and trim:
- Skip adhesives on freshly painted walls until the paint has fully cured, which can take a few weeks.
- Avoid sticking anything to wallpaper, brick, or heavily textured walls. Use a tension rod or a freestanding stand instead.
- Test a hidden spot, like the inside of a closet, before you commit.
- Take everything down soon after the party, before the adhesive has time to set.
Statement DIY Backdrops That Elevate the Room
A backdrop gives guests a focal point and gives you a place for photos. Three elements do the heavy lifting: fabric, light, and dried florals.
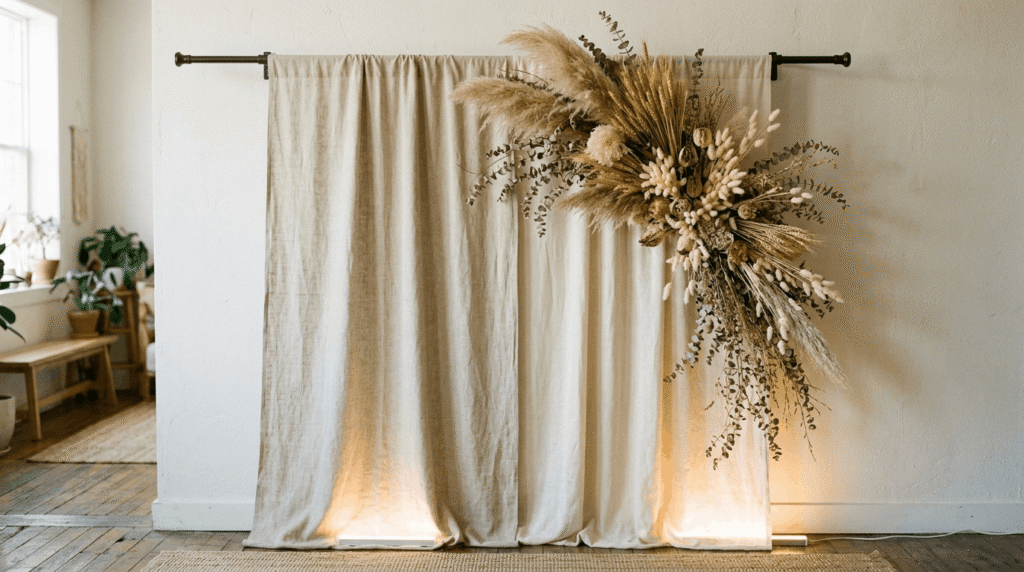
- Pick your spot. Choose a clear wall, a window bay, or a doorway near natural light.
- Drape raw linen. Hang two or three panels of raw linen in oatmeal, cream, or soft white from a tension rod. Let the folds overlap and puddle a little at the floor. Raw linen has a natural texture that looks expensive, and its relaxed wrinkles are part of the charm.
- Add soft LED uplighting. Tuck battery-powered, warm-white LED lights at the base and angle them up so the glow moves through the folds. LEDs stay cool, which keeps the fabric safe. Skip real candles near the linen.
- Finish with asymmetrical dried florals. Instead of a centered, matching arrangement, gather pampas grass, dried wheat, bunny tails, or preserved eucalyptus on one side. Let a few stems trail across the fabric, and wire them to the rod or a light wooden hoop. The uneven balance feels relaxed and intentional.
Balloon Pillar & Arch Architecture (DIY Baby Shower Pillar Decor)
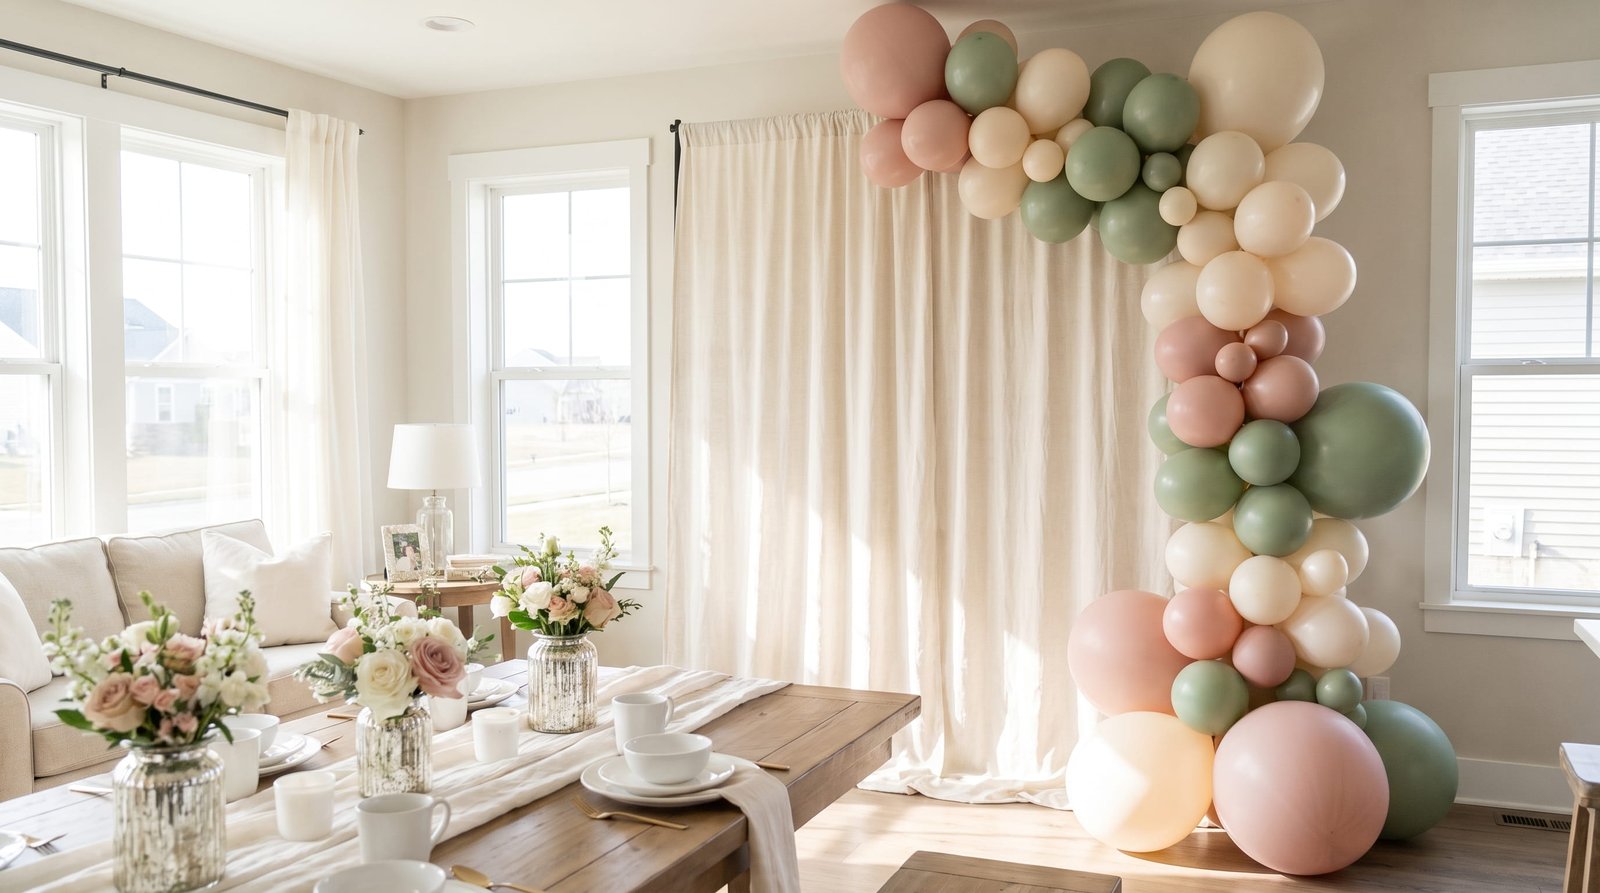
Balloons look elevated when you treat them like sculpture. Keep them low, organic, and limited to a tight palette. Baby shower pillar decor works best when it frames part of your home, such as a mantel or an entryway, instead of filling the room.
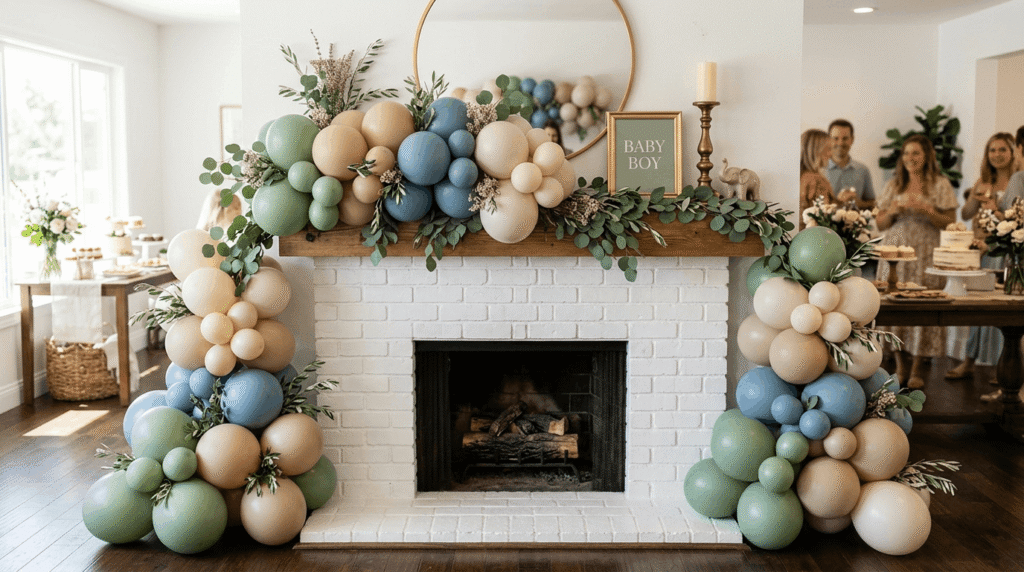
What you need:
- Matte balloons in three sizes: 5-inch, 11 to 12-inch, and 18-inch
- Two to four colors from your palette
- A hand pump
- A weighted column stand (a base and a pole) for freestanding pillars
- A balloon strip or fishing line for a garland
- Fresh, faux, or dried greenery for tucking in
How to build it:
- Double-stuff the balloons. Inflate a small balloon a little, then slide it inside a larger, uninflated balloon in the same color family. Inflate the outer balloon to size and tie it off. A balloon stuffing tool makes this easier. The double layer makes the color look richer and less see-through, and it gives the soft, matte finish that reads as designer instead of party store.
- Build organic clusters. Twist four balloons together into one cluster, and mix small, medium, and large sizes. Uneven shapes look natural, while matching balloons look stiff.
- Stack low pillars. Stack the clusters up the column stand, alternating sizes as you go. Keep each pillar around waist to chest height so it frames the space instead of blocking it. Place one on each side of an entryway, or set two at different heights on either side of a mantel.
- Add an arch, if you like. For a mantel or doorway, make a loose garland instead of a full rainbow arch. Rest it along the mantel shelf, or drape it over a tension rod, so nothing sticks to the wall.
- Break up the roundness. Tuck in eucalyptus, olive stems, or dried pampas to add texture.
Safety first: Use air, not helium, for pillars. Keep balloons away from candles and heat vents. Ask guests about latex allergies ahead of time, and pick up popped pieces right away, since they can be a choking hazard for small children.
Elevated Baby Shower Table Decorations for Dining Rooms & Buffets
The table is where guests spend most of the party, and where many photos happen. Great baby shower table decorations come from layers, not from more stuff.
The Layered Tablescape Formula
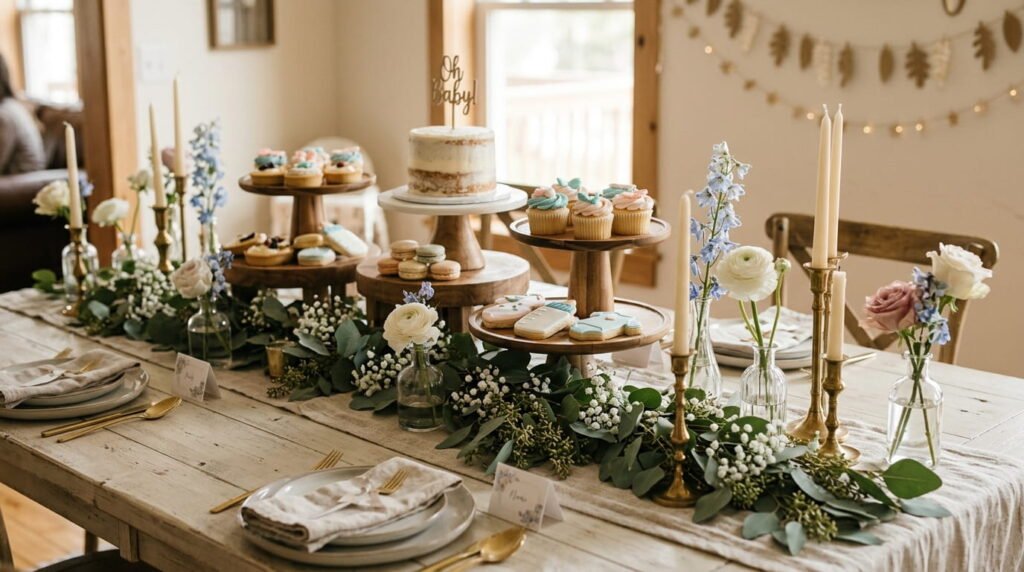
Build the look in three layers, from the bottom up.
- Base textiles. Start with a linen runner in oatmeal, white, or a color from your palette. If your dining table is a beautiful wood, use a runner and let the grain show. Add cloth napkins in a matching tone. Linen has a soft, lived-in drape that plastic cannot copy.
- Height elevation. Add wooden risers, pedestals, and cake stands to create levels. Varied heights make the eye travel along the table. Keep centerpieces low, about a foot tall, so guests can talk across the table. Or lift them well above eye level on slim stands.
- Organic elements. Lay a eucalyptus garland down the center, then add brass candle holders with taper candles and a few bud vases of seasonal stems. Natural shapes soften the hard lines of plates and platters.
Keep real flames away from dried and fresh greenery. LED taper candles give the same glow without the risk.
Styling the Food & Dessert Display
Swap party-store trays for serving pieces you own, or ones you would happily keep. Stoneware bowls, ceramic platters, and vintage glassware look intentional and add depth. Thrift stores are a great source for footed glass compotes, coupe glasses, and small pitchers.
Use the Rule of Threes to arrange everything. Groups of three, in different heights, look natural and balanced to the eye. Try one tall item, one medium item, and one low item in a loose triangle.
- Cake stands: Set up three at different heights, one for the cake or cupcakes, one for cookies, and one for fruit.
- Vases: Cluster three in varied heights with a single stem in each. This keeps the look light and modern.
- Drinks: Serve lemonade or sparkling water with fruit slices in a glass dispenser or pitcher, with cloth napkins close by.
- Labels: Write small food labels on cream cards and set them in brass holders instead of using printed banners.
- Surface protection: Place linen or cork trivets under hot dishes and coasters under cold drinks to protect wood finishes.
Signature Theme Spotlight: Baby Boy Shower Decorations That Blend with Home Aesthetics
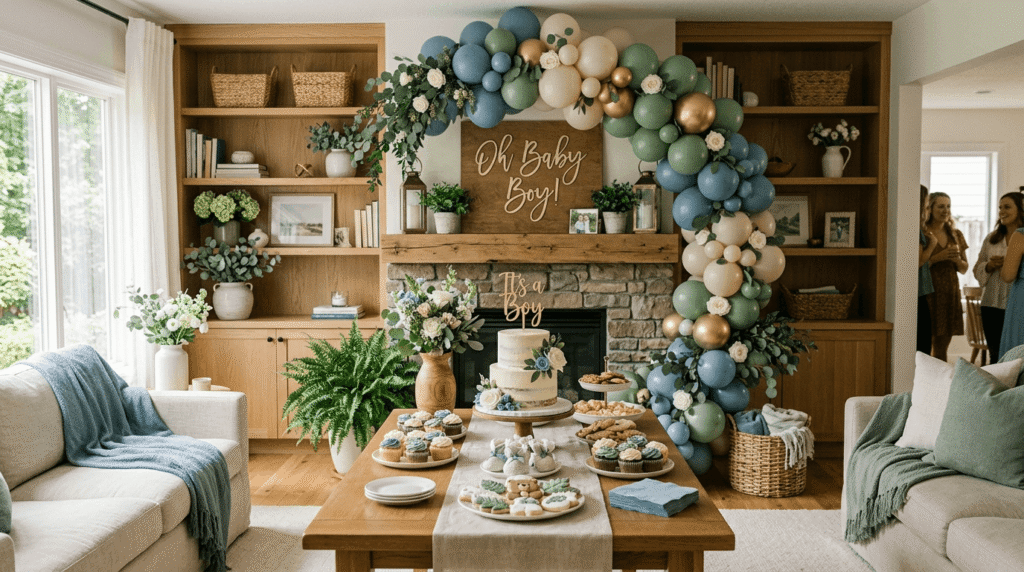
Baby boy shower decorations do not need a wall of bright blue. The most stylish versions read as a color story, not a theme kit.
Architectural & Earthy Color Palettes
Start with five grounded shades:
- Dusty blue: A softer, grayed blue. Use it as your accent in linens, ceramics, and a few balloons.
- Sage green: A calm, leafy green. It ties in eucalyptus, plants, and napkins.
- Warm oak: The wood tone of your risers, boards, and frames. Use your own furniture as the base.
- Charcoal: A grounding neutral. Use it sparingly for menu cards, candle holders, or a single ceramic piece.
- Brushed gold: Quieter than shiny gold. Bring it in through candle holders, flatware, or frame edges.
Use the 60-30-10 rule to balance them: about 60 percent soft neutrals like cream and oak, 30 percent a secondary tone like sage or dusty blue, and 10 percent an accent like brushed gold or charcoal.
Map it across your rooms:
- Entry: A charcoal sign or menu on the console, with sage greenery beside it.
- Living room: Dusty blue in pillows or a throw, plus a few matte balloons.
- Dining room: Warm oak risers, a sage garland, and brushed gold candle holders.
Sophisticated Boy Staging Themes
Botanical Orangery
Picture a sunny greenhouse where citrus trees grow. Fill wooden bowls and cake stands with lemons and oranges, which work as both decor and a fresh snack. Add small terracotta pots with herbs or olive branches. Use blue linen for the runner or napkins, and set out blue-and-white ceramics if you own them. Keep balloon clusters to matte sand, dusty blue, and a small pop of soft orange, and finish the table with brass.
Modern Coastal
Think calm, sun-washed color instead of sailor clichés. Use washed navy, a soft, faded navy, on a runner or napkins. Drape a cream knit throw over a chair, and add knit or woven baskets for texture. Use driftwood as a riser or centerpiece, and pair it with white ceramics. Skip the anchors, sailboats, and cartoon whales. A palette of navy, cream, and wood says “coastal” all on its own.
Choose Botanical Orangery if your home has warm wood and plants. Choose Modern Coastal if your rooms are light, airy, and neutral.
Signature Theme Spotlight: Baby Girl Shower Decorations That Match Home Interiors
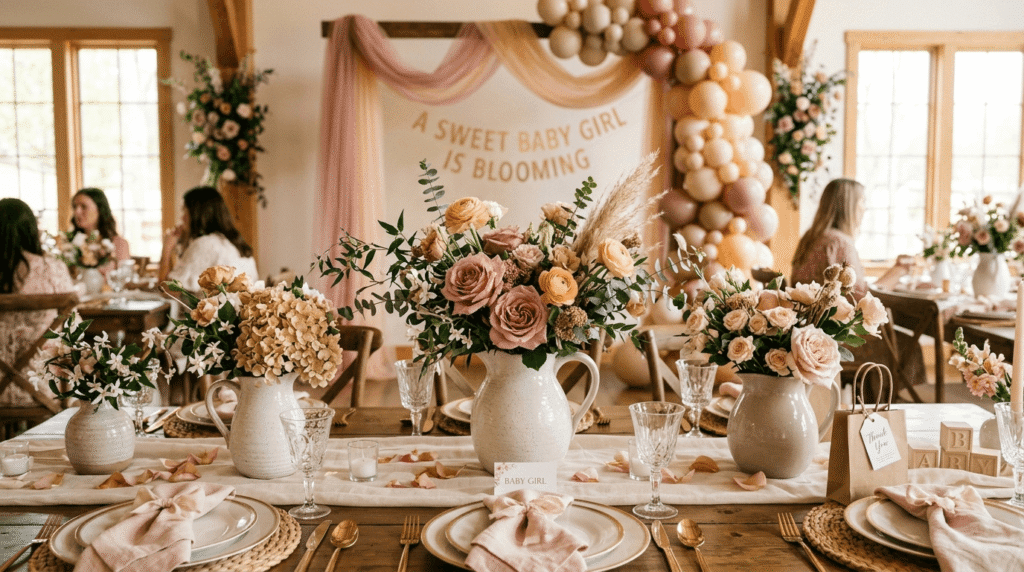
Baby girl shower decorations look most refined when pink stays muted. Skip bright bubblegum shades and reach for tones that already live in a well-styled home.
Subdued & Refined Color Palettes
- Muted rose: A dusty pink with gray undertones. Use it in florals, napkins, and a few balloons.
- Warm peach: Softer than coral, with a sunlit glow. Use it in ceramics, linens, and dried stems.
- Mauve: A soft, grayed purple that adds depth. Use it in candles, a velvet pillow, or a single vase.
- Champagne: A gentle, warm metallic. Use it for balloons, candle holders, and flatware.
- Cream: Your base color. Use it for textiles and cake stands so the other shades can breathe.
Let cream and champagne lead, and let rose and peach play the supporting roles.
Map it across your rooms:
- Entry: Cream linen with a small blush arrangement on the console.
- Living room: Mauve pillows and a few champagne balloons.
- Dining room: Peach and rose florals in ceramic pitchers, with champagne candle holders.
Chic Girl Staging Themes
French Countryside Garden
Gather blush florals such as garden roses, ranunculus, or spray roses in ceramic pitchers and jugs. Arrange them loosely, as if you just cut them from the garden. Hang linen drapery behind the dessert table on a tension rod, or use a nearby window. Set out white cake stands, woven bread baskets, and vintage glass. A cream linen runner with a slightly frayed edge completes the look.
Warm Terracotta & Peach
Anchor the space with pampas grass in a tall floor vase near the entry or beside the dessert table. Add rattan accents such as trays, placemats, or a woven pendant shade. Bring in terracotta pots, peach linen napkins, and sand-toned matte balloons in small clusters. The result feels warm, relaxed, and grown-up.
Choose French Countryside Garden if you love fresh flowers and vintage finds. Choose Warm Terracotta & Peach if your home leans warm, earthy, and natural.
Creative Baby Shower Decoration Ideas for Small Spaces & Apartments
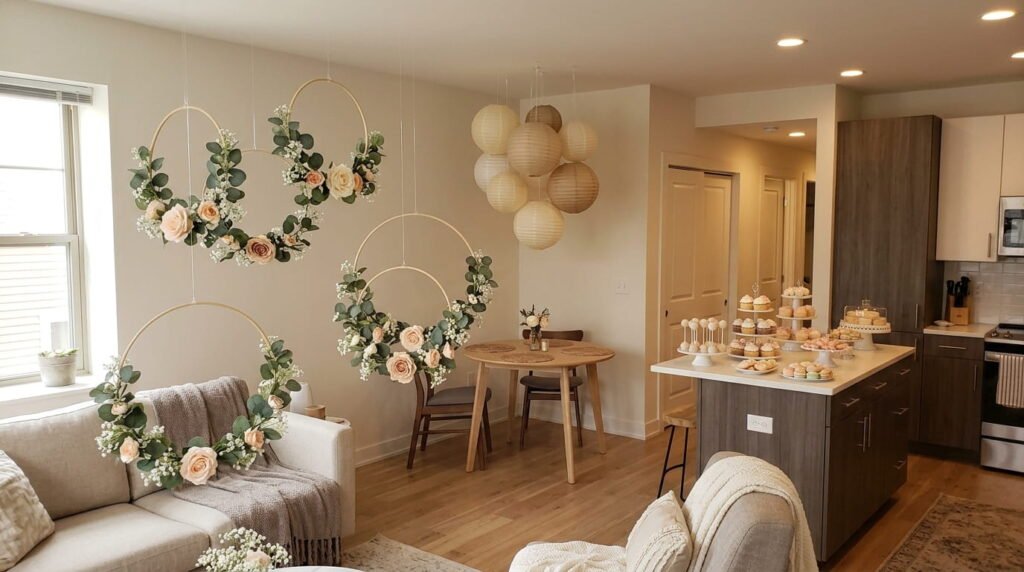
A small home can still host beautifully. The trick is to look up and to let your furniture do double duty. These baby shower decoration ideas keep floors open and surfaces clear.
Vertical Space Maximization
- Suspended floral hoops: Wrap metal or wooden hoops with greenery and dried stems, then hang them at different heights on clear fishing line. Keep the lowest edge above standing head height so no one has to duck.
- Paper lanterns: These are lightweight and easy to hang. Cluster three at different heights above the dining table, in white or cream. Use battery-powered LED lights inside, never a hot bulb or a flame.
- Light ceiling installations: A loose swag of sheer fabric or a strand of warm fairy lights can make the ceiling part of the design. Use removable ceiling hooks only on smooth ceilings, and check the weight limit first. If the ceiling is off limits, hang items from a tension rod or curtain rod instead.
Anything overhead should be very light and firmly secured. When in doubt, hang it from a rod rather than the ceiling.
Multi-Functional Furniture Hacks
- Entry console: Turn it into your welcome zone with a guest book, a small vase, and a tray for cards.
- Kitchen island: Cover it with a linen runner and use it as a dessert or drink station. Clear the everyday clutter first, and use a wooden cutting board as a riser.
- Bookshelves: Edit a shelf or two into a themed display. Group books in your palette, add a small vase, and set out framed photos. Use one shelf as a “book for baby” spot where guests can leave a favorite children’s book.
- Bar cart: Roll it out as a mobile dessert table, then tuck it away when the party ends.
The Post-Shower Cleanup & Sustainability Playbook
The best baby shower decor does not end up in the trash bag. Plan for its second life before the party starts.
Repurposing & Upcycling Event Decor
- Greenery: Hang eucalyptus bundles to dry in the kitchen or bathroom, or trim the stems for small bedside vases.
- Dried florals and pampas: Move them into a floor vase in the living room or a nursery corner. They can last for months.
- Linen: Keep the runners for everyday dining, and hang the panels as curtains in a guest room or nursery.
- Tableware: Add the ceramic platters, stoneware, cake stands, and brass candle holders to your everyday hosting kit.
- Wood and driftwood: Use risers as trays or shelf stands, and let driftwood become a styling piece on a bookshelf.
- Fresh flowers: Send small bouquets home with guests, or give one to the parents-to-be.
- Balloons: Toss them in the trash, and never release them outdoors, since they can harm wildlife.
- Hosting bin: Store tension rods, fishing line, LED lights, clips, and extra hooks in one labeled bin. The next party will be far easier.
Conclusion: Hosting a Stylish, Stress-Free Baby Shower at Home
The most beautiful baby shower decorations feel like your home on its best day. Start with the 3-Zone Layout so guests move with ease. Light the room with warm, layered lamps. Hang your decor with tools that leave no marks. Build the table in layers, and choose a color palette that fits the rooms you already live in. Then plan for what happens after the party, so the pieces you love stay and the rest go without waste.
When your decor follows the “Invisible Event” Rule, the celebration feels calm, personal, and polished. You will not be managing a party takeover. You will be enjoying a beautiful afternoon with the people who matter most, in a home that still looks and feels like yours.


Leave a Reply