

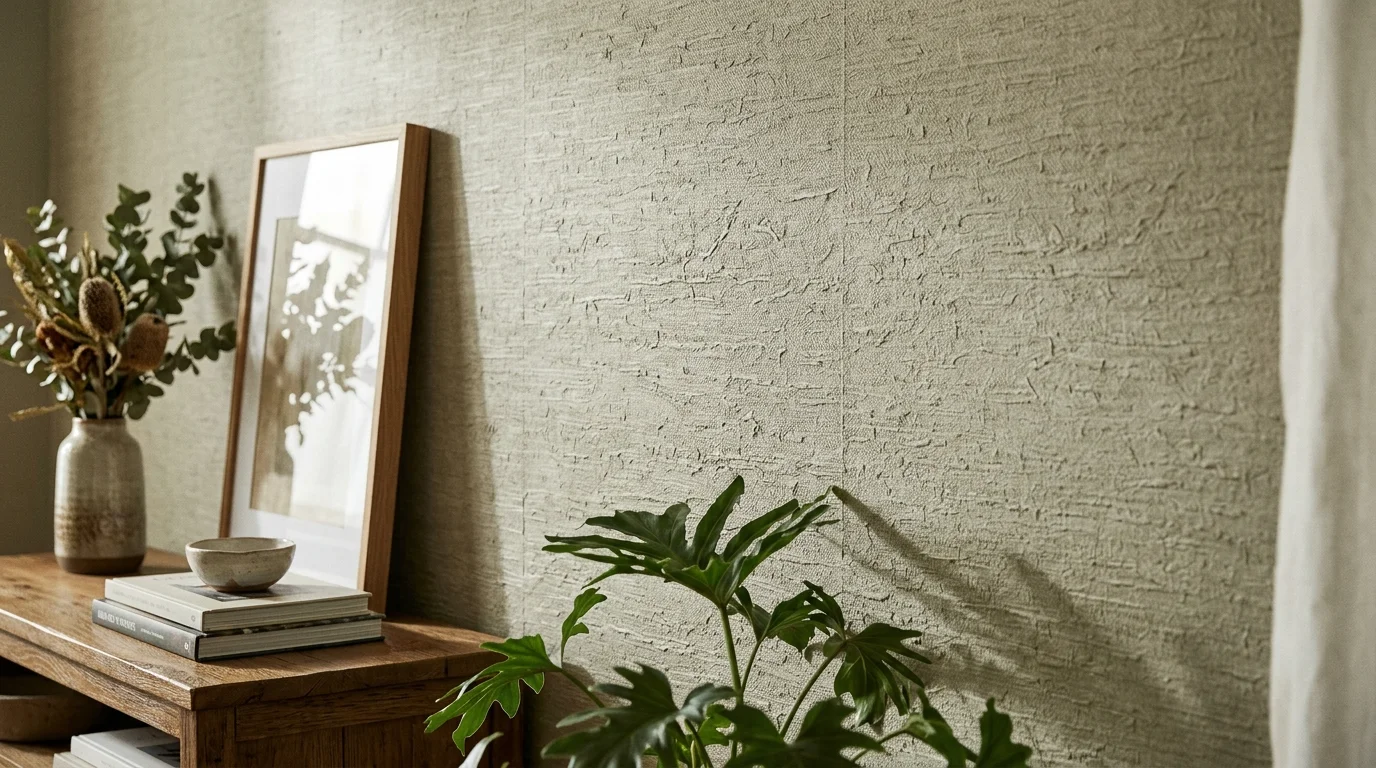
If you’ve got orange peel, knockdown, or heavy-stomp texture on your walls, you’ve probably wondered whether a nice wallpaper is even an option, or whether you’re stuck living with speckled walls and paint touch-ups forever.
The direct answer: yes, you can wallpaper over textured walls. But it only looks good if you match the wallpaper’s weight to how rough the texture actually is, prep the surface properly first, and use the right adhesive and tools during installation. Skip any one of those three, and you’ll see every bump telegraphing through the paper within a few weeks.
This guide walks through how to size up your wall’s texture level, which wallpaper types actually hold up over texture (and two that don’t), how to prep the surface so the paper lays flat, and how to install it so the finish looks seamless.
How Textured Is Your Wall?
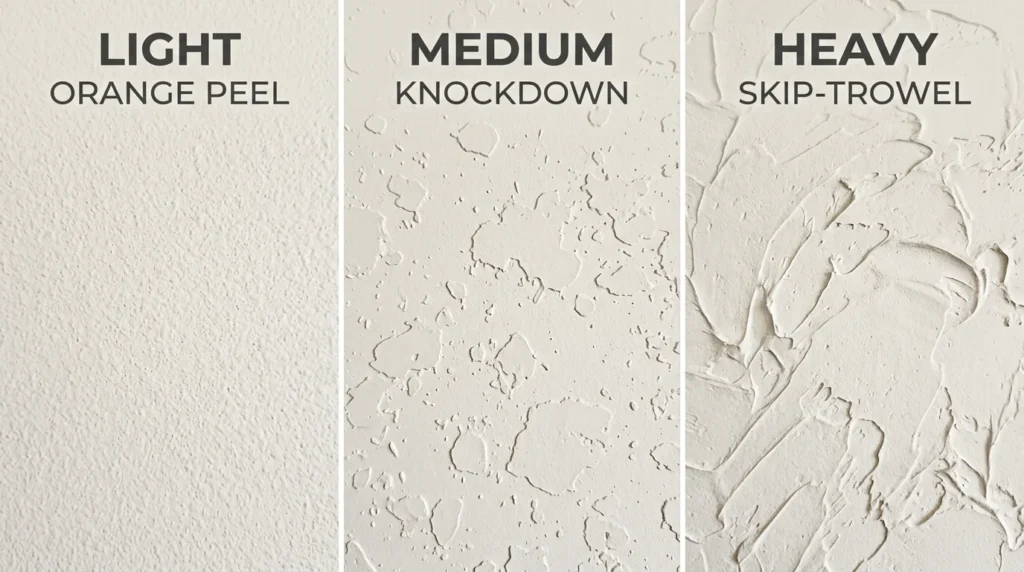
Before picking a wallpaper, get an honest read on how rough your wall actually is. The three levels below determine almost everything else in this guide: the wallpaper you choose and the prep work you’ll need both come down to this.
Light texture (orange peel / light splatter): A fine, even, slightly pebbled surface, the most common texture in homes built or remodeled from the 1980s onward. Bumps are small and consistent.
Medium texture (knockdown / heavy stomp): An irregular, flattened-splatter pattern with noticeable high spots and visible low points between them. Common in Southwestern and ranch-style homes.
Heavy texture (skip-trowel / heavy hand-trowel / stucco-style): Deep ridges and pronounced relief, often applied by hand with a trowel for a rustic or old-world look. This is the hardest texture to wallpaper over.
Quick test: Hold a straightedge (a yardstick works fine) flat against the wall. If it rocks or you can see daylight gaps under it in more than a spot or two, you’re dealing with Medium or Heavy texture, so plan on lining the wall before anything else.
Best Wallpaper Types for Textured Walls
Once you know your texture level, the wallpaper itself does a lot of the heavy lifting. These three types are the most forgiving over an imperfect surface.
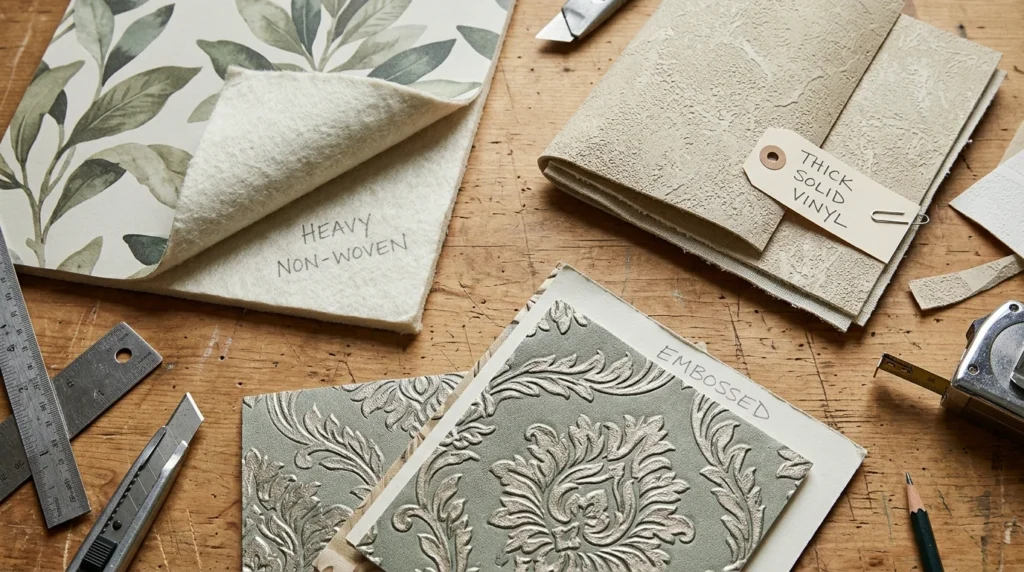
Heavy-duty non-woven wallpaper Non-woven wallpaper doesn’t stretch or shrink as it dries the way traditional paper-backed wallpaper can, so it won’t pull tight against the wall and highlight every bump underneath. It also strips off dry in one piece later, which matters if you ever redecorate. This is the safest default for Light to Medium texture, and it works well over a liner for Heavy texture too.
Thick solid-vinyl wallpaper Solid vinyl is opaque and dense, which gives it genuine masking power over mild texture: light passing through a thin paper will cast shadows on bumps, but a thick vinyl layer mutes that effect. It’s also scrubbable and durable, making it a practical pick for hallways, kids’ rooms, or kitchens where texture and foot traffic both come into play.
Embossed or raised-pattern wallpaper Rather than fighting the wall’s texture, embossed wallpaper works with it: its own raised pattern gives the eye something expected to focus on, so small wall irregularities read as part of the design instead of standing out as flaws. This is a strong pick when you want texture on texture rather than a perfectly flat finish.
What to look for when buying: Check the wallpaper’s weight or gsm (grams per square metre) rating if it’s listed. Heavier stock generally performs better over texture than lightweight decorator paper. Favor “paste-the-wall” non-woven products over thin pre-pasted rolls for anything past Light texture; the heavier backing and stronger bond give you more margin for error on an uneven surface.
Two Wallpaper Types to Avoid
Not every wallpaper is a good match for a textured wall. These two are worth steering clear of unless your wall is already smooth.
Peel-and-stick wallpaper The thin, light adhesive backing on peel-and-stick products is designed to grip a flat, non-porous surface. On a textured wall, the adhesive can’t make full contact in the low points between bumps, so it tends to lift at edges and seams within weeks, especially in humid rooms like bathrooms or kitchens. Save peel-and-stick for smooth walls, cabinet fronts, or furniture.
Natural-fiber wallpaper (grasscloth, jute, sisal) This one surprises people: natural-fiber wallpapers are often assumed to hide imperfections because of their nubby, organic texture, but the opposite is true. Grasscloth and similar weaves need a wall that’s already smooth, clean, and fully primed. Manufacturer installation guides are consistent that any texture or flaw in the wall underneath will show through and interfere with proper adhesion, rather than being absorbed by the material. If you love the look of grasscloth, plan on skim coating or lining the wall completely flat first; don’t rely on the material itself to cover for a rough surface.
Texture-to-Wallpaper Quick Reference
| Texture Level | Best Wallpaper Match | Minimum Prep Needed |
| Light (orange peel) | Heavy-duty non-woven or thick vinyl | Clean, degrease, prime/size |
| Medium (knockdown / heavy stomp) | Thick vinyl or embossed/raised-pattern | Light sanding + liner paper |
| Heavy (skip-trowel / stucco-style) | Any of the above, but only after lining | Skim coat or full liner paper, then primer |
Use this as a starting point: when a wall is borderline between two levels, prep for the heavier one rather than the lighter one.
Prep Steps Before Wallpapering Textured Walls
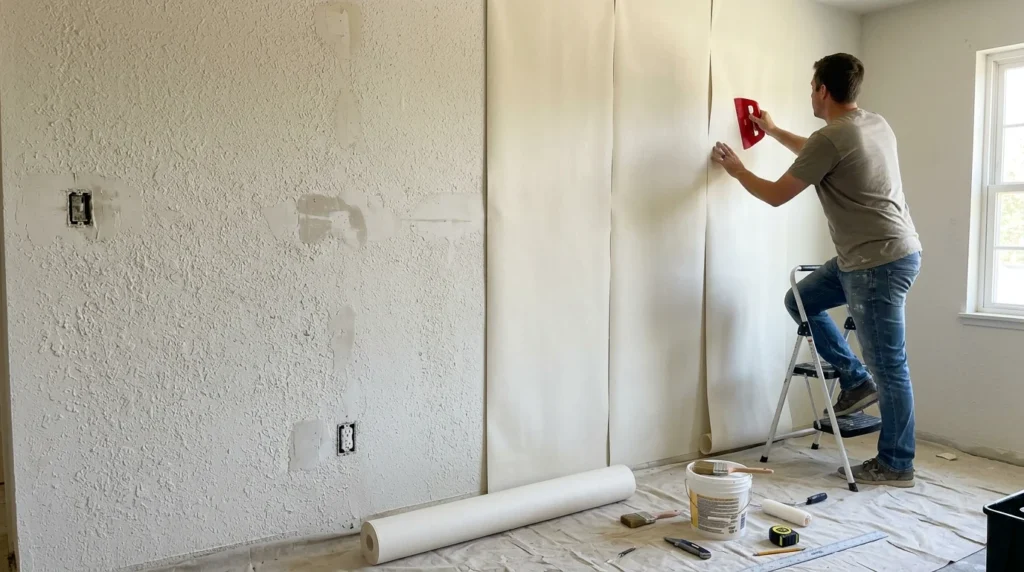
Good prep is what actually determines whether wallpaper holds up over texture. The wallpaper type matters, but prep is where most jobs succeed or fail.
- Clean and degrease the wall. Dust, cooking residue, and old wall washes all weaken paste adhesion. Wash with a mild detergent solution and let the wall dry fully before doing anything else.
- Sand down sharp points and high spots. You’re not trying to flatten the whole wall — just knock back any ridge or peak that could poke through the paper or catch the smoothing tool.
- Apply a heavy-duty wallpaper primer or sizing. This seals porous drywall so it doesn’t drink up paste unevenly, and it gives the paper something consistent to grip across the whole surface, texture or not. Before applying any wall treatment, it’s also worth understanding how different paint finishes affect the appearance and condition of your walls. Learn more about interior paint finishes and how to choose the right option for each room.
- Hang a blank wallpaper liner for anything past Light texture. This is the step people skip and regret. Liner paper is hung horizontally, perpendicular to the direction your finish wallpaper will run, so the seams don’t line up, which bridges small gaps and evens out the surface underneath. For Medium texture, liner paper alone is often enough.
- Consider a skim coat instead, for Heavy texture. If the texture is deep enough that liner paper won’t fully flatten it, a thin layer of joint compound troweled on and sanded smooth is more reliable long-term than stacking liner over heavy ridges. It takes longer upfront but saves you from a lumpy finish.
How to Install Wallpaper Over Textured Walls
With the wall prepped, the install itself comes down to using the right tools and giving the job time to set properly.
- Use a strong, extra-tack adhesive. Standard wallpaper paste is formulated for flat, primed drywall. Textured or lined walls need more grip to hold against the uneven suction underneath, so choose an adhesive rated for heavyweight or specialty wallcoverings rather than a basic all-purpose paste.
- Smooth with a felt tool, not a plastic scraper. A plastic smoothing tool has a hard, thin edge that can catch on a ridge or high spot and tear the paper. A felt smoothing brush or pad glides over minor imperfections instead, pushing out air bubbles without the risk of a rip.
- Work in shorter sections and allow longer drying time. Liner paper plus a finish layer means more paste and more moisture sitting against the wall than a standard single-layer hang. Give each section more time to set before moving the ladder, and don’t rush the top coat on top of a liner that’s still damp.
- Re-check seams a day or two after hanging. As a textured or lined wall finishes drying, minor shrinkage can cause edges to lift slightly, something that often doesn’t show up on install day. Walk the room again 24–48 hours later and press any lifting seams back down with a seam roller and a dab of adhesive before it becomes a bigger problem.
FAQs
Can you wallpaper directly over textured walls without a liner?
For Light texture (orange peel), yes: a heavy-duty non-woven or thick vinyl wallpaper can often go straight on after cleaning and priming. For Medium or Heavy texture, skip the liner and you’ll likely see the texture telegraph through the finish paper within weeks.
Do you need to skim coat, or is lining paper enough?
For Medium texture, a blank liner paper is usually enough on its own. For Heavy texture (deep ridges or hand-troweled relief), a thin skim coat is the more reliable fix, since liner paper alone may not fully flatten pronounced bumps.
Can you use peel-and-stick wallpaper on textured walls?
It’s not recommended. The thin adhesive backing can’t make consistent contact across an uneven surface, so it tends to lift at the edges and in the low points of the texture, especially over time.
Is wallpapering a textured wall the same as wallpapering a popcorn ceiling?
Not quite. Popcorn is an acoustic texture used almost exclusively on ceilings, and ceiling wallpapering has its own set of challenges (gravity working against the paste, for one). Wall textures like orange peel and knockdown are a different application, and that’s what this guide focuses on.
How much does it typically cost to prep and wallpaper a textured wall?
Costs vary a lot by region, wall size, and how much prep is needed, but as a rough guide: liner paper and heavy-duty wallpaper materials tend to add a noticeable premium over a basic flat-wall wallpaper job, largely because of the extra labor for lining or skim coating. Get a quote from a local installer for an accurate number. Texture severity is the biggest cost driver.
Conclusion & Next Steps
Wallpapering a textured wall comes down to four things, in order: honestly assess how rough the texture is, choose a wallpaper weight that matches it, prep the wall (liner or skim coat, depending on severity), and install with the right adhesive and tools.
Quick checklist before you start:
- Texture level assessed (Light / Medium / Heavy)
- Wallpaper type chosen to match
- Wall cleaned, sanded, and primed
- Liner paper or skim coat applied if texture is Medium or Heavy
- Extra-tack adhesive and felt smoothing tool on hand
Get the wall right, and even heavily textured surfaces can take a clean, professional-looking wallpaper finish. Once the surface problem is solved, the fun part is picking a design. See our guide to textured wallpaper ideas for inspiration on bringing more depth and pattern into the room.





Leave a Reply